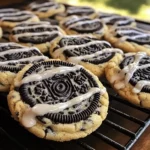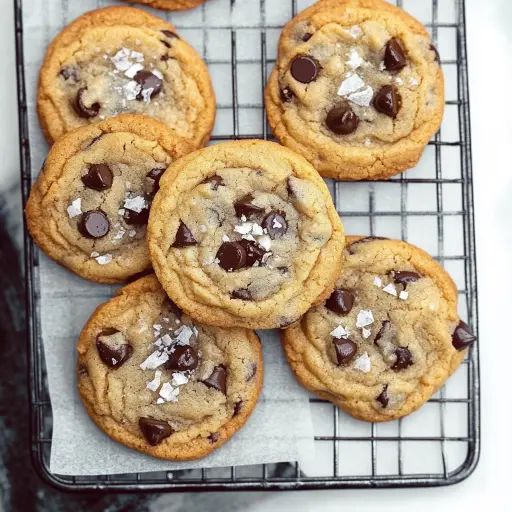
Description: Indulge in the irresistible flavor of these brown butter chocolate chip cookies. The nutty aroma and rich taste of browned butter elevate this classic treat to a whole new level of deliciousness. With their perfectly crisp edges and soft, gooey centers loaded with melted chocolate, these cookies are guaranteed to become a family favorite.
Ingredients:
- 3/4 cup (168 g) unsalted butter* (See Note Below)
- 1 cup (200 g) packed brown sugar
- 1/4 cup (50 g) granulated sugar
- 1 large egg + 1 large egg yolk, room temperature
- 1 tablespoon pure vanilla extract
- 1 3/4 cups (220 g) all-purpose flour
- 3/4 teaspoon baking soda
- 3/4 teaspoon kosher salt + more flaky sea salt for sprinkling
- 1 1/2 cups (225 g) semi-sweet chocolate chips or chopped chocolate
Note on Butter: Using good quality butter is crucial for achieving the rich, nutty flavor we’re aiming for. European-style butter, with its higher fat content, works wonderfully and will result in an even more decadent cookie. Make sure the butter is cold before you begin the browning process. This will help to control the browning and prevent it from burning too quickly. Don’t use margarine or spread in its place.
Preparation:
Step 1: Brown the Butter: Place the unsalted butter in a light-colored saucepan (this helps you monitor the browning process). Melt the butter over medium heat, stirring constantly with a heatproof spatula. As the butter melts, it will begin to foam. Continue stirring; the foam will subside, and you’ll start to see golden brown specks forming at the bottom of the pan. The butter will also emit a distinct, nutty aroma. Be careful not to burn the butter. Remove it from the heat immediately once it has turned a light golden-brown color and smells nutty. Pour the browned butter into a heat-safe bowl or measuring cup to stop the cooking process and allow it to cool slightly. (about 10 minutes)
Step 2: Cream the Sugars and Brown Butter: In a large mixing bowl (or the bowl of a stand mixer fitted with the paddle attachment), combine the slightly cooled brown butter, packed brown sugar, and granulated sugar. Beat on medium speed until the mixture is light and fluffy, about 2-3 minutes. This step is important for creating a well-aerated dough, which results in a softer cookie. Make sure to scrape down the sides of the bowl occasionally to ensure all ingredients are evenly incorporated.
Step 3: Incorporate Eggs and Vanilla: Add the egg, egg yolk, and vanilla extract to the sugar and butter mixture. Mix on medium speed until well combined, scraping down the sides of the bowl as needed. The extra egg yolk adds richness and chewiness to the cookies.
Step 4: Combine Dry Ingredients: In a separate bowl, whisk together the all-purpose flour, baking soda, and kosher salt. Whisking ensures that the baking soda and salt are evenly distributed throughout the flour, which is crucial for proper leavening and flavor balance.
Step 5: Combine Wet and Dry Ingredients: Gradually add the dry ingredients to the wet ingredients, mixing on low speed until just combined. Be careful not to overmix the dough, as this can develop the gluten in the flour and result in tough cookies. Mix until the flour is almost fully incorporated, then stop and proceed to the next step.
Step 6: Add Chocolate: Gently fold in the semi-sweet chocolate chips (or chopped chocolate) until evenly distributed throughout the dough. Do not overmix at this stage. A few streaks of flour remaining are okay.
Step 7: Chill the Dough: Cover the bowl with plastic wrap and refrigerate the cookie dough for at least 30 minutes, or preferably overnight. Chilling the dough allows the flavors to meld together and prevents the cookies from spreading too much during baking. For best results, chill the dough for 24-48 hours.
Step 8: Preheat and Prepare: When you’re ready to bake, preheat your oven to 350°F (175°C). Line a baking sheet with parchment paper or a silicone baking mat. This will prevent the cookies from sticking and ensure easy cleanup.
Step 9: Scoop and Bake: Use a 1.5-2 ounce cookie scoop (or a spoon) to scoop the cookie dough into balls. Place the dough balls about 2 inches apart on the prepared baking sheet.
Step 10: Sprinkle with Sea Salt: Lightly sprinkle the tops of the cookie dough balls with flaky sea salt. This adds a delightful salty-sweet contrast to the cookies.
Step 11: Bake: Bake for 9-12 minutes, or until the edges are golden brown and the centers are still slightly soft. The baking time will depend on your oven and the size of the cookies. Keep a close eye on them to prevent them from overbaking.
Step 12: Cool and Enjoy: Remove the baking sheet from the oven and let the cookies cool on the sheet for a few minutes before transferring them to a wire rack to cool completely. This allows the cookies to set up slightly and prevents them from breaking.
Why You Will Love This Recipe:
This brown butter chocolate chip cookie recipe is a game-changer! The simple act of browning the butter transforms the flavor of these cookies from ordinary to extraordinary. The nutty, caramelized notes of the brown butter add a depth of flavor that is simply irresistible. The texture is perfect: crisp edges, soft and chewy centers, and plenty of gooey chocolate. These cookies are also incredibly easy to make, requiring only a few simple ingredients and minimal effort. Plus, the recipe is easily customizable. If you’re looking for a chocolate chip cookie recipe that will impress everyone who tries them, look no further! You will love this recipe because:
- Unparalleled Flavor: The brown butter creates a rich, complex flavor profile that sets these cookies apart.
- Perfect Texture: The combination of chilling the dough and using the right baking time results in cookies with crisp edges and soft, chewy centers.
- Easy to Make: This recipe is straightforward and simple, even for beginner bakers.
- Crowd-Pleasing: These cookies are guaranteed to be a hit with everyone, from kids to adults.
- Customizable: The recipe can be easily adapted to suit your preferences, such as using different types of chocolate or adding nuts or other mix-ins.
COOKING Rating: 5/5 stars! An absolute must-try recipe.
Serving Suggestions:
- Serve warm with a cold glass of milk or a scoop of vanilla ice cream.
- Pack them in a lunchbox for a special treat.
- Bring them to a potluck or bake sale.
- Give them as a homemade gift to friends and family.
- Enjoy them as a late-night snack.
- Pair them with a cup of coffee or tea for a cozy afternoon treat.
- Crumble them over ice cream or yogurt for a delicious dessert topping.
Tips:
- Don’t over-brown the butter: Burnt butter will make the cookies taste bitter.
- Chill the dough: Chilling is essential for preventing the cookies from spreading too much and for developing the flavors.
- Don’t overmix the dough: Overmixing will develop the gluten in the flour and result in tough cookies.
- Use a cookie scoop: Using a cookie scoop will ensure that all the cookies are the same size, which will help them bake evenly.
- Bake on parchment paper or a silicone baking mat: This will prevent the cookies from sticking and make cleanup easier.
- Don’t overbake the cookies: Overbaked cookies will be dry and crumbly.
- Experiment with different types of chocolate: Try using dark chocolate, milk chocolate, or white chocolate chips for a different flavor.
- Add nuts or other mix-ins: Add chopped nuts, dried fruit, or sprinkles to the dough for extra flavor and texture.
- Store cookies in an airtight container at room temperature: Store cookies in an airtight container at room temperature for up to 3 days. For longer storage, freeze the baked cookies or the cookie dough.
- High Altitude Baking: If you live in a high-altitude area, you may need to adjust the recipe slightly. Reduce the amount of sugar by 1-2 tablespoons and increase the amount of flour by 1-2 tablespoons. You may also need to reduce the baking time by a minute or two.
Prep Time: 20 minutes
Cook Time: 9-12 minutes
Total Time: 50 minutes (including chilling time)
Nutritional Information: (per cookie, approximate)
Calories: 220-250 Protein: 3g Sodium: 150mg
Conclusion:
These Brown Butter Chocolate Chip Cookies are a delightful twist on a classic recipe. The nutty flavor of the brown butter elevates these cookies to a whole new level of deliciousness, making them a truly unforgettable treat. The recipe is easy to follow, and the results are consistently perfect. So, gather your ingredients, preheat your oven, and get ready to bake a batch of these irresistible cookies. You won’t be disappointed!
Questions and Answers about The Ultimate Brown Butter Chocolate Chip Cookies:
Q1: Why is it important to brown the butter for this recipe?
A: Browning the butter is the key to what makes these cookies so special! It transforms the butter’s flavor from a simple dairy taste to a rich, nutty, almost caramel-like flavor that permeates the entire cookie. The browning process involves heating the butter until the milk solids separate and toast, creating a depth of flavor that you just can’t achieve with regular melted butter. It’s the secret ingredient that elevates these chocolate chip cookies to gourmet status.
Q2: Can I skip the chilling step if I’m short on time?
A: While you can skip the chilling step, I highly recommend against it. Chilling the dough allows the butter to solidify, which prevents the cookies from spreading too much during baking. It also gives the flavors time to meld together, resulting in a more complex and delicious cookie. If you’re really short on time, a minimum of 30 minutes in the refrigerator is better than nothing. However, chilling the dough overnight (or even for 24-48 hours) will yield the best results.
Q3: What kind of chocolate is best to use in these cookies?
A: Semi-sweet chocolate chips are the standard choice for chocolate chip cookies, and they work beautifully in this recipe. However, feel free to experiment with different types of chocolate to suit your preferences. Dark chocolate chips or chunks will add a richer, more intense chocolate flavor. Milk chocolate chips will create a sweeter, more classic chocolate chip cookie taste. You can even use a combination of different chocolates for a more complex flavor profile. Chopped chocolate bars are also a great option, as they create pools of melted chocolate throughout the cookies.
Q4: My cookies are spreading too thin when I bake them. What am I doing wrong?
A: There are several reasons why your cookies might be spreading too thin:
- The butter was too warm: Make sure the browned butter has cooled slightly before adding it to the sugar.
- The dough wasn’t chilled enough: Chilling the dough is essential for preventing the cookies from spreading.
- The oven temperature is too low: Use an oven thermometer to ensure that your oven is accurately calibrated.
- You’re using too much sugar: Too much sugar can cause the cookies to spread.
- You’re overmixing the dough: Overmixing develops the gluten in the flour, which can cause the cookies to spread.
- Your baking sheet is greased: Always bake cookies on parchment paper or a silicone baking mat to prevent them from sticking and spreading.
Q5: Can I freeze the cookie dough or the baked cookies?
A: Yes, absolutely! Both the cookie dough and the baked cookies freeze very well. To freeze the cookie dough, scoop the dough into balls and place them on a baking sheet lined with parchment paper. Freeze for about 30 minutes, or until the dough balls are solid. Then, transfer the frozen dough balls to a freezer-safe bag or container. The dough can be frozen for up to 2 months. When you’re ready to bake, simply remove the dough balls from the freezer and bake as directed, adding a few extra minutes to the baking time.
To freeze the baked cookies, allow them to cool completely. Then, place them in a freezer-safe bag or container, separating the layers with parchment paper. The cookies can be frozen for up to 3 months. When you’re ready to eat them, simply thaw them at room temperature or warm them in the oven for a few minutes.