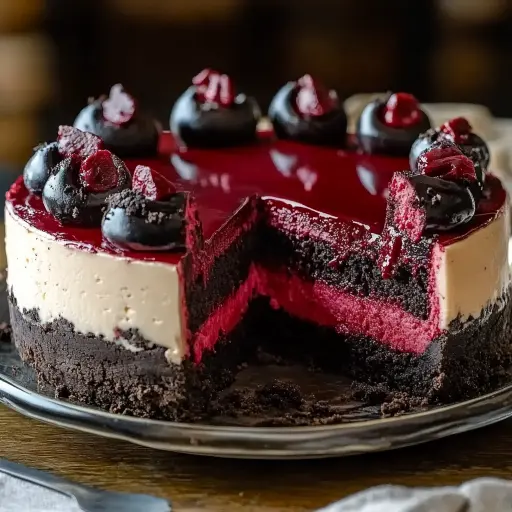
Description: A decadent dessert that combines the best of both worlds: rich and tangy cheesecake with a soft, chewy red velvet cookie dough base and irresistible edible cookie dough topping. This show-stopping treat is perfect for special occasions and sure to impress any dessert lover.
Ingredients:
For the Red Velvet Cookie Dough Base:
- 1 1/2 cups all-purpose flour
- 1/2 cup unsalted butter, softened
- 1/2 cup packed brown sugar
- 1/4 cup granulated sugar
- 1 large egg
- 1 teaspoon vanilla extract
- 1 tablespoon red food coloring (gel food coloring recommended for vibrant color)
- 1/2 teaspoon baking soda
- 1/4 teaspoon salt
- 1/2 cup mini chocolate chips
For the Cheesecake Filling:
- 3 (8 oz) packages cream cheese, softened (full-fat cream cheese is essential)
- 1 cup granulated sugar
- 3 large eggs
- 1 teaspoon vanilla extract
- 1/4 cup sour cream (full-fat preferred for richness)
- 1/4 cup heavy cream
- 2 tablespoons all-purpose flour
For the Cookie Dough Topping:
- 1/2 cup unsalted butter, softened
- 1/4 cup granulated sugar
- 1/4 cup packed brown sugar
- 2 tablespoons milk
- 1 teaspoon vanilla extract
- 1/2 cup all-purpose flour (heat-treated to ensure it’s safe to eat)
- 1/4 teaspoon salt
- 1/2 cup mini chocolate chips
Preparation:
Step 1: Prepare the Red Velvet Cookie Dough Base:
- Preheat your oven to 350°F (175°C). This precise temperature ensures even baking of the cookie dough base, preventing burning or undercooking.
- Line a 9-inch springform pan with parchment paper. This provides a non-stick surface and makes it easy to remove the cheesecake after baking. Grease the sides of the pan with butter or cooking spray to further prevent sticking.
- In a large bowl, cream together the softened butter, brown sugar, and granulated sugar using an electric mixer. Beat on medium speed until the mixture is light and fluffy, typically 3-5 minutes. This process incorporates air into the mixture, resulting in a tender and well-textured cookie dough.
- Add the egg, vanilla extract, and red food coloring to the creamed mixture. Mix until smooth and evenly combined. Gel food coloring is recommended as it delivers a more vibrant color with less liquid, preventing the cookie dough from becoming too wet.
- In a separate bowl, whisk together the all-purpose flour, baking soda, and salt. Whisking ensures that these dry ingredients are evenly distributed, which is crucial for proper leavening and flavor.
- Gradually add the dry ingredients to the wet mixture, mixing on low speed until just combined. Avoid overmixing, as this can develop the gluten in the flour and result in a tough cookie dough.
- Stir in the mini chocolate chips.
- Press the cookie dough mixture evenly into the bottom of the prepared pan. Use your fingers or the back of a spoon to create a smooth, even layer.
- Bake for 10-12 minutes, or until the edges are lightly golden and the center is just set. The cookie dough should be slightly firm to the touch. Overbaking will result in a dry, crumbly base.
- Allow the base to cool completely in the pan while you prepare the cheesecake filling. This is crucial as the base needs to be completely cooled before pouring on the cheesecake filling so the base will not continue cooking.
Step 2: Prepare the Cheesecake Filling:
- In a large mixing bowl, beat the softened cream cheese and granulated sugar together using an electric mixer. Beat on medium speed until smooth and creamy, ensuring there are no lumps. This step is critical for a smooth and creamy cheesecake texture. Softened cream cheese is essential for achieving this consistency.
- Add the eggs one at a time, beating well after each addition. Beating after each egg incorporates air and ensures even distribution.
- Stir in the vanilla extract, sour cream, heavy cream, and all-purpose flour until well combined. The sour cream and heavy cream add richness and moisture to the cheesecake. The flour helps to stabilize the filling and prevent cracking during baking. Mix until just combined; do not overmix.
Step 3: Assemble and Bake the Cheesecake:
- Pour the cheesecake filling over the cooled red velvet cookie dough base, gently spreading it out evenly with a spatula.
- Bake in the preheated oven at 325°F (163°C) for 55-60 minutes, or until the center is just set but still slightly jiggly. The cheesecake should be mostly firm with a slight wobble in the center when gently shaken.
- Turn off the oven and let the cheesecake cool in the oven for 1 hour with the oven door slightly ajar. This slow cooling process helps to prevent cracking.
- Afterward, remove it from the oven and let it cool to room temperature on a wire rack. Once cooled, cover it with plastic wrap and refrigerate for at least 4 hours or preferably overnight. This chilling period allows the cheesecake to fully set and develop its flavor.
Step 4: Prepare the Cookie Dough Topping:
- Heat-treat the flour by spreading it on a baking sheet and baking at 350°F (175°C) for 5 minutes. This kills any potential bacteria. Let cool completely before using.
- In a medium bowl, cream together the softened butter, granulated sugar, and brown sugar until fluffy, around 3-5 minutes. An electric mixer is recommended.
- Add the milk and vanilla extract and mix until smooth.
- Gradually stir in the heat-treated flour and salt. Ensure the flour is fully incorporated without overmixing.
- Stir in the mini chocolate chips.
Step 5: Assemble and Serve:
- Once the cheesecake has chilled and set, carefully remove it from the springform pan. Run a thin knife around the edge of the pan before releasing the sides to ensure a clean release.
- Top the cheesecake with the prepared cookie dough pieces. You can either drop the cookie dough on top randomly for a rustic look or arrange them in a decorative pattern.
Why You Will Love This Recipe:
This Red Velvet Cookie Dough Cheesecake is a truly indulgent and unforgettable dessert. It’s the perfect combination of textures and flavors – the creamy, tangy cheesecake, the soft, chewy red velvet cookie dough base, and the irresistible edible cookie dough topping. The red velvet flavor adds a touch of sophistication, while the cookie dough elements bring a playful and comforting twist. It’s a guaranteed crowd-pleaser for any occasion, and the wow factor is undeniable.
Cooking Rating:
Intermediate – while the recipe has multiple steps, each step is relatively straightforward. Attention to detail and patience are key to achieving the best results.
Serving Suggestions:
- Serve chilled, ideally after being refrigerated overnight.
- Slice with a warm, damp knife for clean cuts.
- Garnish with a dusting of cocoa powder or a drizzle of melted chocolate for added visual appeal.
- Pair with a scoop of vanilla ice cream or a dollop of whipped cream for an extra decadent treat.
- Serve with fresh berries for a refreshing contrast to the richness of the cheesecake.
- A glass of milk, coffee, or dessert wine will nicely complement the flavors.
Tips:
- Ensure all ingredients, especially the cream cheese, are at room temperature for a smooth and lump-free filling.
- Don’t overmix the cheesecake filling, as this can incorporate too much air and cause the cheesecake to crack.
- Bake the cheesecake in a water bath for an even creamier texture and to minimize cracking. Wrap the bottom of the springform pan tightly in aluminum foil to prevent water from seeping in. Place the wrapped pan in a larger roasting pan and add hot water to the roasting pan until it reaches halfway up the sides of the springform pan.
- If the top of the cheesecake starts to brown too quickly, tent it with aluminum foil.
- Let the cheesecake cool slowly to prevent cracking. Turn off the oven and let it cool inside the oven for an hour with the door slightly ajar. Then, cool at room temperature before refrigerating.
- For the cookie dough topping, use heat-treated flour to ensure it’s safe to eat raw. You can heat-treat the flour by spreading it on a baking sheet and baking it at 350°F (175°C) for 5 minutes.
- Store leftover cheesecake in the refrigerator for up to 5 days.
Prep Time: 45 minutes
Cook Time: 65 minutes
Total Time: 5 hours (includes chilling time)
Nutritional Information (per serving, estimated):
- Calories: 650
- Protein: 12g
- Sodium: 350mg
Conclusion:
This Red Velvet Cookie Dough Cheesecake is more than just a dessert; it’s an experience. The layers of flavor and texture combine to create a truly unforgettable treat that’s perfect for any special occasion. While it requires a bit of effort, the end result is well worth it. Get ready to impress your friends and family with this show-stopping masterpiece!
Questions and Answers:
Q1: Can I use a different size springform pan?
A: While a 9-inch springform pan is recommended for the stated baking times and proportions, you can use a different size. However, adjust the baking time accordingly. A smaller pan will require a longer baking time, while a larger pan will require a shorter baking time. Keep a close eye on the cheesecake and bake until the center is just set but still slightly jiggly. Be aware a larger pan will also result in a thinner cheesecake.
Q2: Can I make the red velvet cookie dough base ahead of time?
A: Yes, you can make the red velvet cookie dough base a day or two in advance. Wrap it tightly in plastic wrap and store it in the refrigerator. When you’re ready to use it, let it sit at room temperature for about 15-20 minutes to soften slightly before pressing it into the pan.
Q3: Is it necessary to heat-treat the flour for the cookie dough topping?
A: Yes, it is highly recommended to heat-treat the flour for the cookie dough topping to ensure it is safe to eat raw. Raw flour can contain bacteria that can cause illness. Heat-treating the flour kills any potential bacteria.
Q4: What can I do if my cheesecake cracks?
A: Cracking can be caused by several factors, including overbaking, sudden temperature changes, or overmixing the batter. To prevent cracking, avoid overbaking the cheesecake and let it cool slowly in the oven with the door ajar. If your cheesecake does crack, don’t worry! It will still taste delicious. You can cover the cracks with the cookie dough topping or a dusting of cocoa powder.
Q5: Can I freeze this cheesecake?
A: Yes, you can freeze this cheesecake. Wrap it tightly in plastic wrap and then in aluminum foil. Freeze for up to 2-3 months. Thaw it in the refrigerator overnight before serving. Be aware that freezing can slightly alter the texture of the cheesecake.