Description of this recipe
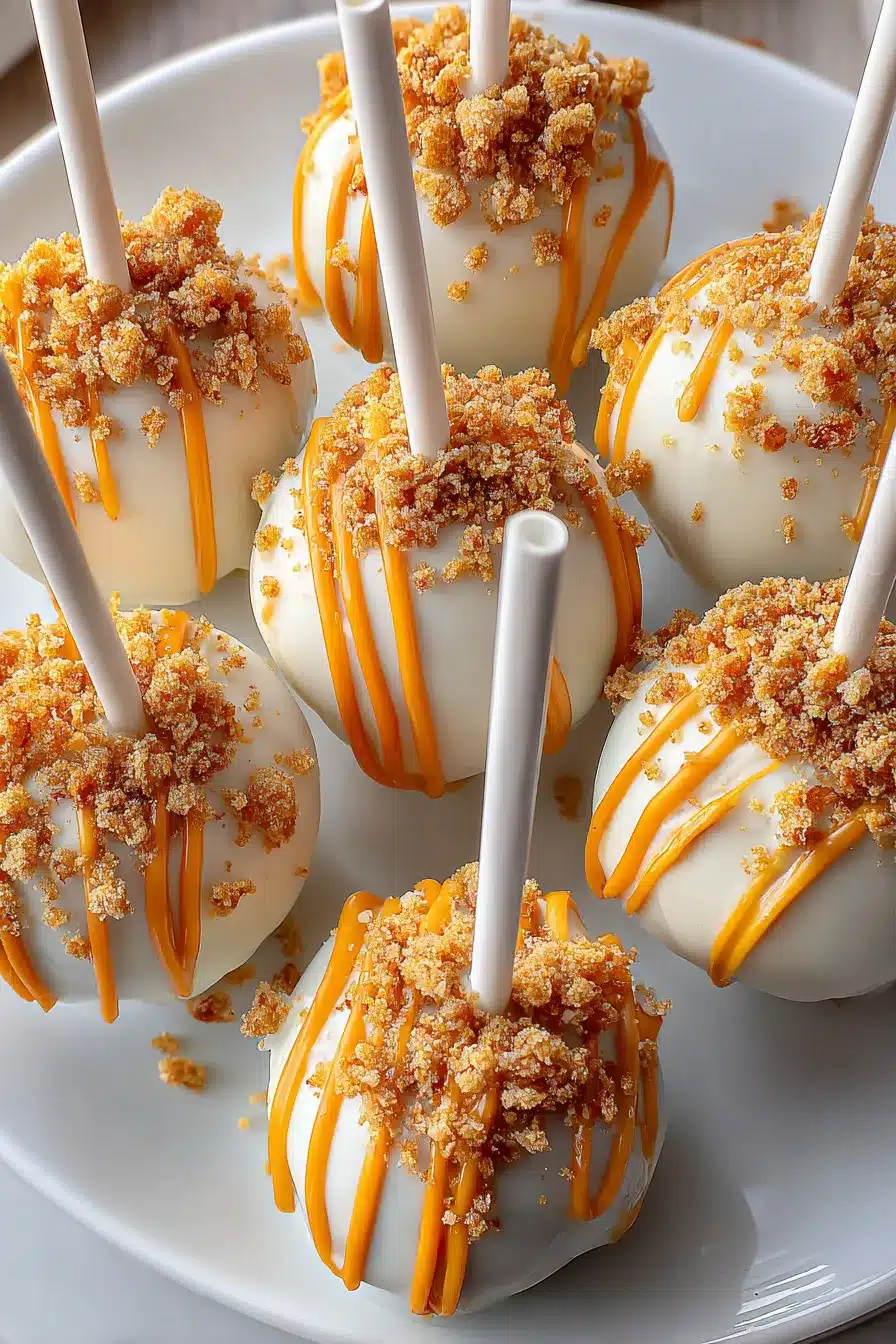
These Pumpkin Spice Cake Pops are the perfect autumn treat, combining the warm flavors of pumpkin spice with the fun and convenience of a cake pop. These delightful morsels are ideal for fall parties, holiday gatherings, or just a cozy afternoon snack. The moist, flavorful cake, combined with creamy frosting and a sweet candy coating, will be a hit with both kids and adults alike. The added touch of gingerbread cookie crumbles or festive sprinkles makes them as beautiful as they are delicious, turning a simple cake pop into a miniature work of art.
Why you will love this recipe
You will absolutely adore these Pumpkin Spice Cake Pops for several reasons. First, they are incredibly easy to make, starting with a simple spice cake mix that saves you time without sacrificing flavor. The addition of pumpkin puree and pumpkin pie spice amplifies the autumn flavors, creating a warm and comforting taste. The texture is perfectly balanced—moist and tender cake mixed with creamy frosting, all encased in a crisp candy shell. These cake pops are also highly customizable. You can use different types of candy melts for the coating, vary the sprinkles or cookie crumbles for decoration, and even add a drizzle of melted chocolate for an extra touch of sweetness. But perhaps the best part is how fun they are to make and share. They are a fantastic project for baking with kids, and their adorable appearance makes them a guaranteed crowd-pleaser at any event.
Ingredients:
Scale
1/2x 1x 2x 3x
1 box of spice cake mix 1 cup canned pumpkin puree 3 large eggs 1⁄3 cup vegetable oil 1 teaspoon pumpkin pie spice 1 cup cream cheese frosting 1 bag white chocolate candy melts, for coating 1⁄2 cup orange candy melts, for decoration Lollipop sticks Crumbled gingerbread cookies or colorful sprinkles for decoration
Preparation:
Step 1: Preheat and Prep
Preheat your oven to 350°F (175°C). Thoroughly grease and flour a 9×13 inch baking pan. This step is crucial to ensure that the cake doesn’t stick to the pan, making it easier to remove and crumble later. Using both grease and flour provides an extra layer of protection, especially for delicate cakes.
Step 2: Mix the Cake Batter
In a large mixing bowl, combine the spice cake mix, canned pumpkin puree, eggs, vegetable oil, and pumpkin pie spice. Mix all ingredients until they are thoroughly combined and the batter is smooth. Be careful not to overmix, as this can result in a tough cake. A smooth batter ensures an even texture throughout the cake. The pumpkin puree adds moisture and enhances the pumpkin flavor, while the pumpkin pie spice infuses the cake with warm, aromatic notes.
Step 3: Bake the Cake
Pour the batter into the prepared baking pan and spread it evenly. Ensure that the batter is uniformly distributed to allow for even baking.
Step 4: Bake Time
Bake in the preheated oven for 25-30 minutes or until a toothpick inserted into the center comes out clean. Start checking for doneness around 25 minutes. If the toothpick comes out with batter, continue baking for a few more minutes and check again. A clean toothpick indicates that the cake is fully baked.
Step 5: Cool the Cake
Once baked, remove the cake from the oven and allow it to cool completely. Cooling the cake completely is essential before crumbling it. Warm cake will be too soft and difficult to handle, resulting in a sticky mixture. You can expedite the cooling process by placing the cake in the refrigerator for a shorter period, but ensure it is fully cooled before proceeding.
Step 6: Crumble the Cake
Once cooled, crumble the cake into a large bowl. Ensure there are no large chunks. The goal is to create fine, even crumbs that will easily mix with the frosting.
Step 7: Add Frosting
Add the cream cheese frosting to the crumbled cake and mix thoroughly until the mixture comes together and is easy to shape. The amount of frosting may need to be adjusted depending on the moisture content of the cake and the consistency of the frosting. The mixture should be moist enough to hold its shape but not so wet that it becomes sticky.
Step 8: Shape the Cake Pops
Roll the cake mixture into small balls, about the size of a walnut, and place them onto a baking sheet lined with parchment paper. Using parchment paper prevents the cake balls from sticking to the baking sheet. Uniform size is important for even coating and a professional appearance.
Step 9: Melt the Chocolate
Melt the white chocolate candy melts according to the package instructions. Candy melts can be melted in the microwave or using a double boiler. If using a microwave, melt in 30-second intervals, stirring in between, to prevent burning. Ensure the chocolate is smooth and completely melted.
Step 10: Insert Lollipop Sticks
Dip the end of each lollipop stick into the melted white chocolate and insert it into a cake ball, not all the way through. This will help secure the stick in place. The melted chocolate acts as an adhesive, ensuring that the stick stays firmly attached to the cake pop.
Step 11: Chill the Cake Pops
Place the cake pops in the freezer for about 15-20 minutes to firm up. Chilling the cake pops makes them easier to dip in the melted chocolate. A firm cake pop holds its shape better and prevents the stick from sliding out.
Step 12: Dip in Chocolate
After they are firm, remove from the freezer and dip each cake pop into the melted white chocolate until fully coated. Gently tap to remove excess chocolate. Work quickly, as the cold cake pops will cause the chocolate to harden rapidly. Tapping off excess chocolate ensures a smooth, even coating.
Step 13: Decorate
Before the chocolate hardens, decorate the cake pops with crumbled gingerbread cookies or colorful sprinkles for a festive touch. Have your decorations ready and within reach before you start dipping, as you need to decorate the cake pops before the chocolate sets.
Step 14: Add Drizzle
Melt the orange candy melts and drizzle over the cake pops for an additional decorative flair. Use a piping bag or a spoon to drizzle the melted orange candy over the white chocolate-coated cake pops.
Step 15: Set the Cake Pops
Once decorated, stand the cake pops upright in a styrofoam block or a cake pop stand until completely set. This prevents the decorations from smudging and ensures that the chocolate hardens evenly.
COOKING Rating:
Easy
Serving Suggestions:
Serve these Pumpkin Spice Cake Pops at fall festivals, Halloween parties, Thanksgiving gatherings, or as a sweet treat for any occasion. They can also be packaged individually and given as gifts. Pair them with a warm cup of apple cider or pumpkin spice latte for the ultimate autumn experience.
Tips:
To prevent the cake pops from cracking, ensure that the cake balls are cold and the melted chocolate is at a consistent temperature. If the chocolate becomes too thick, add a small amount of vegetable shortening to thin it out. For a smoother coating, use high-quality candy melts. Experiment with different decorations such as chopped nuts, shredded coconut, or edible glitter. To make the cake pops ahead of time, store them in an airtight container in the refrigerator for up to three days.
Prep Time:
30 minutes
Cook Time:
25 minutes
Total Time:
1 hour 30 minutes
Nutritional Information:
Calories: Approximately 250 calories per cake pop (estimated) Protein: 3 grams (estimated) Sodium: 150mg (estimated)
Conclusion
These Pumpkin Spice Cake Pops are a delightful and festive treat that perfectly captures the flavors of fall. Easy to make and endlessly customizable, they are sure to be a hit at any gathering. The combination of moist spice cake, creamy frosting, and a sweet candy coating makes them irresistible. So gather your ingredients, get creative with your decorations, and enjoy the process of making these adorable and delicious cake pops. Whether you’re baking with kids, preparing for a party, or simply craving a sweet autumn treat, these Pumpkin Spice Cake Pops are the perfect choice.
Questions and Answers About This Recipe
Question 1: Can I use a different type of cake mix?
Answer: Yes, you can certainly use a different type of cake mix if you prefer. Yellow cake mix or even chocolate cake mix can be a delicious alternative. Keep in mind that changing the cake mix will alter the overall flavor profile of the cake pops. If you use a different cake mix, you might want to adjust the spices accordingly to complement the new flavor. For example, if using chocolate cake mix, you could add a pinch of cinnamon or chili powder to enhance the chocolate flavor.
Question 2: What can I use instead of cream cheese frosting?
Answer: If you’re not a fan of cream cheese frosting, you can substitute it with other types of frosting. Vanilla buttercream frosting or even a simple chocolate ganache would work well. Alternatively, you can make a homemade frosting using a combination of butter, powdered sugar, and a splash of milk or cream. The key is to choose a frosting that is thick enough to hold the cake crumbs together without making the mixture too wet.
Question 3: How do I prevent the cake pops from falling off the sticks?
Answer: Preventing the cake pops from falling off the sticks is a common concern, but there are a few tricks to ensure they stay secure. First, make sure the cake balls are chilled in the freezer for at least 15-20 minutes before dipping them in the melted chocolate. This will help them firm up and prevent them from crumbling. Second, dip the end of the lollipop stick into the melted chocolate before inserting it into the cake ball. The chocolate acts as a glue, helping to secure the stick in place. Finally, don’t insert the stick all the way through the cake ball, as this can weaken the structure.
Question 4: Can I make these cake pops ahead of time?
Answer: Yes, you can definitely make these cake pops ahead of time. Once they are fully decorated and the chocolate has set, store them in an airtight container in the refrigerator for up to three days. If you need to store them for longer, you can freeze them for up to a month. Just be sure to thaw them in the refrigerator before serving to prevent condensation from forming on the chocolate coating.
Question 5: What if my candy melts are too thick?
Answer: If your candy melts are too thick, you can thin them out by adding a small amount of vegetable shortening or coconut oil. Start with about a teaspoon of shortening or oil and stir it into the melted candy until it reaches a smooth, pourable consistency. Be careful not to add too much liquid, as this can cause the chocolate to seize. If you accidentally add too much liquid, you can try adding a small amount of powdered sugar to thicken it back up.