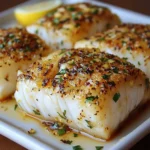
Description: A delightfully sticky and savory Honey Garlic Chicken recipe that’s quick, easy, and packed with flavor. Perfect for a weeknight dinner, this dish features tender chicken coated in a luscious honey-garlic sauce that’s both sweet and savory.
Ingredients:
- 1. 5 lbs boneless, skinless chicken thighs (or breasts, cut into 1-inch pieces)
- 1/4 cup honey (preferably local and raw for the best flavor)
- 4 cloves garlic, minced (freshly minced is highly recommended)
- 1/4 cup soy sauce (low sodium preferred to control saltiness)
- 2 tablespoons olive oil (or avocado oil)
- 1 teaspoon ginger, freshly grated (optional, but adds a warm spice)
- 1 tablespoon cornstarch (optional, for thickening the sauce)
- 2 tablespoons water (if using cornstarch)
- Salt and pepper, to taste
- 2 green onions, thinly sliced (for garnish, optional)
- Sesame seeds (for garnish, optional)
Preparation:
Step 1: Prepare the Chicken: If using chicken breasts, cut them into 1-inch pieces. Pat the chicken thighs or breasts dry with paper towels. This crucial step ensures better browning during cooking. Season generously with salt and pepper on all sides. Don’t be shy with the seasoning; it’s the foundation of the flavor!
Step 2: Prepare the Honey Garlic Sauce: In a small bowl, whisk together the honey, soy sauce, minced garlic, and grated ginger (if using). Ensure the honey is well combined with the soy sauce to prevent clumping during cooking. Set aside.
Step 3: Prepare the Cornstarch Slurry (Optional): If you prefer a thicker sauce, in a separate small bowl, whisk together the cornstarch and water until smooth. This mixture is called a slurry and prevents the cornstarch from clumping when added to the hot sauce.
Step 4: Cook the Chicken: Heat the olive oil in a large skillet over medium-high heat. Ensure the skillet is hot before adding the chicken. Add the chicken in a single layer, avoiding overcrowding the pan. Cook for 6-8 minutes per side, or until the chicken is browned and cooked through. An internal temperature of 165°F (74°C) is recommended for food safety. If using chicken thighs, cooking them a bit longer will make them even more tender. The Maillard reaction (browning) is crucial for developing deeper flavors, so don’t rush this step.
Step 5: Simmer the Honey Garlic Sauce: Remove the cooked chicken from the pan and set aside on a plate. Add the honey garlic mixture to the same skillet, scraping up any browned bits from the bottom of the pan. These browned bits, called fond, add a ton of flavor to the sauce. Bring the sauce to a simmer, stirring occasionally, for 2-3 minutes. If using the cornstarch slurry, slowly pour it into the simmering sauce while stirring constantly. Continue to simmer until the sauce has thickened to your desired consistency, about 1-2 minutes.
Step 6: Coat the Chicken in Sauce: Return the cooked chicken to the skillet with the honey garlic sauce. Toss to coat the chicken evenly in the sauce. Ensure every piece of chicken is glistening with the delicious glaze. Cook for an additional minute or two, allowing the sauce to further adhere to the chicken.
Step 7: Garnish and Serve: Transfer the Honey Garlic Chicken to a serving platter. Garnish with thinly sliced green onions and sesame seeds (if using) for a pop of color and added flavor. Serve immediately while hot and the sauce is at its best.
Why You Will Love This Recipe:
This Honey Garlic Chicken recipe is a surefire winner for several reasons:
- Ease of Preparation: It comes together quickly with minimal effort, making it perfect for busy weeknights.
- Flavorful: The combination of sweet honey, savory soy sauce, and pungent garlic creates a deeply satisfying and addictive flavor profile.
- Versatile: It pairs well with a variety of sides, making it a flexible option for different meal preferences.
- Kid-Friendly: The slightly sweet flavor is appealing to children, making it a great way to introduce them to Asian-inspired cuisine.
- Customizable: You can easily adjust the level of sweetness, garlic, or ginger to suit your personal taste. You can also use different cuts of chicken, such as wings or drumsticks.
- Budget-Friendly: Chicken thighs are an affordable protein option, making this recipe easy on the wallet.
COOKING Rating:
Easy
Serving Suggestions:
- Rice: Serve over steamed white rice, brown rice, or jasmine rice to soak up the delicious sauce.
- Noodles: Toss with cooked noodles such as lo mein, ramen, or soba noodles for a satisfying meal.
- Vegetables: Serve alongside steamed or stir-fried vegetables such as broccoli, bok choy, carrots, or snap peas.
- Salad: A refreshing side salad with a light vinaigrette can balance the richness of the chicken.
- Quinoa: For a healthier option, serve over cooked quinoa.
Tips:
- Don’t overcrowd the pan: Cook the chicken in batches to ensure proper browning. Overcrowding the pan lowers the temperature and results in steamed chicken instead of browned chicken.
- Use fresh garlic: Freshly minced garlic has a much stronger and more vibrant flavor than pre-minced garlic.
- Adjust the sweetness: If you prefer a less sweet sauce, reduce the amount of honey.
- Marinate the chicken: For even more flavor, marinate the chicken in the honey garlic sauce for at least 30 minutes (or up to overnight) before cooking.
- Spice it up: Add a pinch of red pepper flakes to the sauce for a touch of heat.
Prep Time:
10 minutes
Cook Time:
20 minutes
Total Time:
30 minutes
Nutritional Information: (Approximate, per serving)
- Calories: 350-400
- Protein: 30-35g
- Sodium: 500-700mg (depending on soy sauce used)
Conclusion:
This Honey Garlic Chicken recipe is a delightful and easy-to-prepare dish that’s sure to become a family favorite. Its versatility and customizable nature make it a winner for any occasion. Enjoy!
Frequently Asked Questions (FAQ):
Q1: Can I use chicken breasts instead of chicken thighs?
A: Absolutely! While chicken thighs are juicier and more forgiving, chicken breasts work perfectly fine. Just be mindful not to overcook them, as they can dry out more easily. Cutting the breasts into 1-inch pieces helps ensure even cooking and prevents them from becoming tough.
Q2: How can I make the sauce thicker without using cornstarch?
A: If you prefer not to use cornstarch, you can thicken the sauce by simmering it for a longer period. Allow the sauce to reduce gradually over medium-low heat until it reaches your desired consistency. Stir frequently to prevent sticking and burning. You could also add a small amount of a thick fruit puree, like applesauce, for a natural thickening agent and added sweetness.
Q3: Can I prepare this dish ahead of time?
A: Yes, you can prepare the chicken and sauce separately ahead of time. Cook the chicken and prepare the sauce as directed, then store them in separate airtight containers in the refrigerator for up to 2 days. When ready to serve, reheat the chicken and sauce in a skillet over medium heat, tossing to combine until heated through. Adding a splash of water or chicken broth can help prevent the sauce from drying out during reheating.
Q4: Is there a vegetarian version of this recipe?
A: Certainly! You can substitute the chicken with firm tofu, seitan, or even cauliflower florets. Press the tofu to remove excess moisture before cutting it into cubes. Toss the tofu or cauliflower with a little cornstarch and pan-fry or bake until golden brown. Then, proceed with the recipe using the same honey garlic sauce.
Q5: Can I bake the chicken instead of pan-frying it?
A: Yes, baking is a great hands-off option. Preheat your oven to 400°F (200°C). Season the chicken as directed and arrange it in a single layer on a baking sheet lined with parchment paper. Bake for 20-25 minutes, or until the chicken is cooked through and the internal temperature reaches 165°F (74°C). Then, transfer the baked chicken to a skillet and toss it with the prepared honey garlic sauce.