Description of this recipe
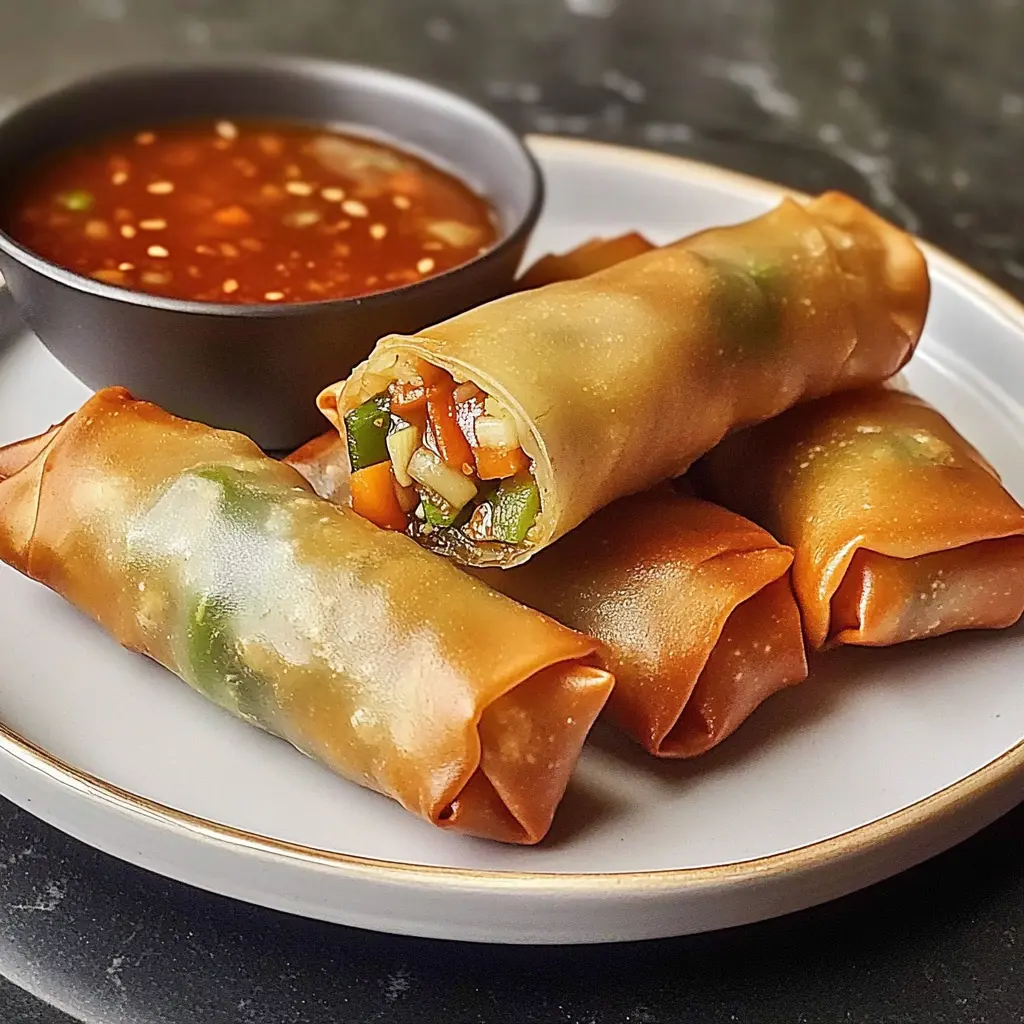
These spring rolls are a delightful combination of crispy, golden-brown wrappers filled with a savory mixture of pork, shiitake mushrooms, and fresh vegetables. Served with a tangy and sweet dipping sauce, they’re perfect as an appetizer, snack, or even a light meal. The recipe offers both frying and baking options, catering to different preferences and health considerations.
Why you will love this recipe
You’ll love this recipe because it’s:
- Flavorful: The combination of pork, shiitake mushrooms, and fresh vegetables creates a rich and savory filling.
- Texturally satisfying: The crispy wrapper contrasts beautifully with the tender filling.
- Versatile: You can customize the filling with your favorite vegetables or protein.
- Fun to make: Rolling the spring rolls is a great activity to do with friends or family.
- ** crowd-pleasing:** perfect appetizer
Ingredients:
For the Filling:
- 1 tbsp oil
- 2 garlic cloves, finely chopped
- 400g (13 oz) pork mince (or chicken/turkey)
- 6 dried shiitake mushrooms, soaked and chopped (or 8 fresh)
- 1 ½ cups shredded carrot
- 1 ½ cups bean sprouts
- 1 ½ cups shredded green cabbage
- 1 tsp cornflour
- 1 ½ tbsp oyster sauce
- 2 tsp soy sauce
For the Rolls:
- 15–20 spring roll wrappers (21.5 cm / 8” squares), thawed
- 2 tsp cornflour
- 1 tbsp water
- Oil for frying or spray oil for baking
For the Sweet & Sour Sauce:
- 2 tsp cornflour
- 2 tbsp water
- ½ cup apple cider vinegar
- ⅓ cup brown sugar
- 2 tbsp tomato ketchup
- 2 tsp soy sauce
Preparation:
Step 1: Prepare the filling. Heat oil in a large skillet or wok over high heat. Add the finely chopped garlic and stir-fry for about 30 seconds until fragrant, being careful not to burn it.
Step 2: Add the pork mince (or your choice of chicken or turkey) to the skillet. Stir-fry, breaking up the meat with a spoon or spatula, until it turns white and is no longer pink. This ensures the meat is cooked through and safe to consume.
Step 3: Add the chopped shiitake mushrooms (or fresh mushrooms if using), shredded carrot, bean sprouts, and shredded green cabbage to the skillet. Stir-fry for approximately 3 minutes, or until the vegetables begin to wilt and soften slightly. This will help release their flavors and create a more cohesive filling.
Step 4: Stir in the cornflour, oyster sauce, and soy sauce into the filling mixture. Cook for an additional minute, or until the liquid has evaporated and the filling has thickened slightly. The cornflour acts as a thickening agent, binding the filling together.
Step 5: Remove the filling from the heat and allow it to cool completely. This is crucial to prevent the wrappers from becoming soggy when you assemble the spring rolls. While the filling cools, you can prepare the sweet and sour sauce.
Step 6: Prepare the sealing paste by mixing 2 teaspoons of cornflour with 1 tablespoon of water in a small bowl until smooth. This paste will be used to seal the spring rolls, preventing them from opening during cooking.
Step 7: Place a spring roll wrapper on a clean, flat surface, positioning it in a diamond shape with one point facing you. Ensure the smooth side of the wrapper is facing down.
Step 8: Place a heaped spoonful of the cooled filling in the center of the wrapper, closer to the bottom point. Be careful not to overfill the wrapper, as this can make it difficult to roll and seal.
Step 9: Fold the bottom point of the wrapper over the filling, then fold in the two side points towards the center, creating an envelope shape.
Step 10: Tightly roll the spring roll away from you, continuing to roll until you reach the top point.
Step 11: Use the cornflour paste to seal the final edge of the wrapper, ensuring the spring roll is securely closed. Repeat steps 7-11 with the remaining wrappers and filling.
Step 12: Heat oil in a wok or deep pan until it reaches a temperature where bubbles appear around a chopstick when dipped into the oil. This indicates the oil is hot enough for frying.
Step 13: Carefully add 4-5 spring rolls at a time to the hot oil, being careful not to overcrowd the pan.
Step 14: Fry the spring rolls for 1 ½ – 2 minutes, or until they are deep golden brown and crispy on all sides.
Step 15: Remove the fried spring rolls from the oil and place them on a plate lined with paper towels to drain excess oil.
Step 16: Alternatively, for baking, place the spring rolls on a wire rack set over a baking tray. Spray generously with oil and bake in a preheated oven at 200°C/400°F for 20-25 minutes, or until golden brown and crispy, turning halfway through.
Step 17: While the spring rolls are cooking, prepare the sweet and sour sauce. Combine all the sauce ingredients (cornflour, water, apple cider vinegar, brown sugar, tomato ketchup, and soy sauce) in a small saucepan.
Step 18: Simmer the sauce over medium heat for 3-5 minutes, stirring constantly, until it thickens to your desired consistency.
COOKING Rating:
Medium
Serving Suggestions:
Serve the crispy spring rolls hot with the sweet and sour sauce for dipping. They are also delicious with other dipping sauces like plum sauce, chili sauce, or peanut sauce. Garnish with fresh cilantro or green onions for added flavor and visual appeal.
Tips:
- Don’t overfill the spring roll wrappers, or they will be difficult to roll and seal.
- Make sure the filling is completely cool before rolling the spring rolls.
- Use a good-quality spring roll wrapper for the best results.
- Fry the spring rolls in hot oil for a crispy texture.
- If baking, use a wire rack to allow air to circulate around the spring rolls, ensuring they crisp up evenly.
Prep Time:
30 minutes
Cook Time:
20 minutes
Total Time:
50 minutes
Nutritional Information:
(Per serving, estimated)
Calories:
250-350
Protein:
10-15g
Sodium:
400-600mg
Conclusion
Crispy Pork and Veggie Spring Rolls with Sweet & Sour Sauce are a delicious and versatile dish that can be enjoyed as an appetizer, snack, or light meal. With their flavorful filling and crispy wrapper, they’re sure to be a hit with everyone. Whether you choose to fry or bake them, these spring rolls are easy to make and can be customized to your liking. So, gather your ingredients and get ready to enjoy a batch of homemade spring rolls that are far better than any takeout version! Enjoy!
Questions and Answers about this recipe
Q1: Can I use different vegetables in the filling?
A: Absolutely! Feel free to customize the filling with your favorite vegetables. Some great alternatives or additions include shredded cabbage, bell peppers, snow peas, mushrooms, or water chestnuts. Just be sure to chop them finely so they cook evenly.
Q2: Can I make these spring rolls ahead of time?
A: Yes, you can prepare the spring rolls ahead of time and store them in the refrigerator. Place them in a single layer on a baking sheet lined with parchment paper, and cover them loosely with plastic wrap to prevent them from drying out. Fry or bake them just before serving for the best results.
Q3: Can I freeze these spring rolls?
A: Yes, spring rolls freeze well. Assemble the spring rolls, then place them in a single layer on a baking sheet lined with parchment paper. Freeze for about 2-3 hours, or until solid. Once frozen, transfer them to a freezer bag or airtight container. They can be stored in the freezer for up to 2-3 months. Fry or bake them directly from frozen, adding a few extra minutes to the cooking time.
Q4: What can I use instead of oyster sauce?
A: If you don’t have or don’t want to use oyster sauce, you can substitute it with hoisin sauce or a mixture of soy sauce and a touch of brown sugar. These alternatives will provide a similar savory and slightly sweet flavor to the filling.
Q5: Can I make these vegetarian or vegan?
A: Yes, you can easily make these spring rolls vegetarian or vegan by replacing the pork mince with a plant-based meat alternative or extra vegetables. Tofu, tempeh, or a mixture of mushrooms and lentils would work well. Also, make sure to use a vegetarian oyster sauce substitute or simply increase the amount of soy sauce.