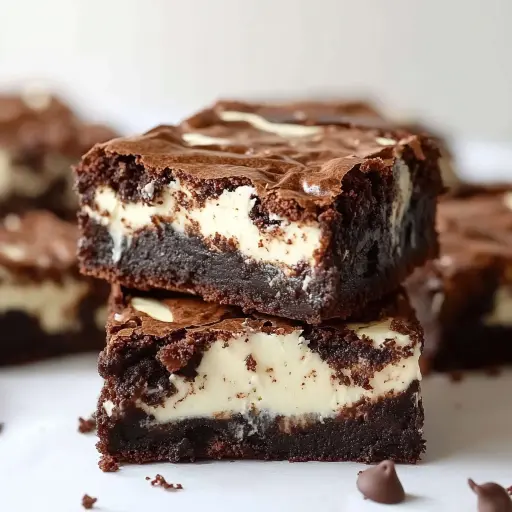
Description: Rich, fudgy brownies swirled with a creamy, tangy cream cheese layer. The perfect balance of chocolate and cheesecake, these brownies are a decadent treat everyone will love.
Ingredients:
- Brownie Batter:
- ½ cup (1 stick) unsalted butter, melted (still warm/hot)
- 1 cup granulated sugar
- 2 large eggs
- 1 tablespoon water
- 2 teaspoons pure vanilla extract
- ⅔ cup unsweetened cocoa powder
- ¾ cup plus 1 tablespoon all-purpose flour
- ½ teaspoon kosher salt
- ½ cup chocolate chips
- Cream Cheese Mixture:
- 8 oz block cream cheese, softened
- ½ cup granulated sugar
- 1 tablespoon all-purpose flour
- 1 large egg white
- ½ teaspoon pure vanilla extract
Preparation:
Step 1: Get Started with Oven Preparation & Pan Prep
- Preheat your oven to 350°F (175°C). Ensuring the oven is at the correct temperature is crucial for even baking and the perfect texture.
- Position a rack in the center of the oven.
- Line an 8×8-inch square baking pan with aluminum foil or parchment paper. Make sure to leave a couple of inches of overhang on two opposite sides. This creates “handles” that will allow you to easily lift the entire tray of brownies out of the pan after baking.
- Grease the foil or parchment paper with butter or cooking spray. This step prevents the brownies from sticking and ensures a clean release.
Step 2: Creating the Base – Brownie Batter
- In a large mixing bowl, combine the melted (but still warm or hot) unsalted butter and granulated sugar. The residual heat from the butter will help to dissolve the sugar crystals, resulting in a shiny, crackly crust on your brownies.
- Stir the butter and sugar briefly, and then let the mixture sit undisturbed for about 5 minutes. This allows the butter to further dissolve the sugar. Don’t expect the sugar to completely dissolve; a slightly grainy texture is normal at this stage.
- After 5 minutes, whisk the butter and sugar vigorously for about 30 seconds. This incorporates air and helps to create a smooth base.
- Add the eggs, water, and vanilla extract to the butter and sugar mixture. Whisk again for another 30 seconds until everything is well combined and the mixture is light and airy.
- Tap any excess batter off the whisk and remove it from the bowl.
Step 3: Mixing in the Dry Ingredients
- Sprinkle the cocoa powder, flour, and salt evenly over the wet ingredients. This prevents clumps from forming and ensures that the dry ingredients are evenly distributed.
- Using a rubber or silicone spatula, gently stir the mixture until it is glossy and well combined. Be careful not to overmix, as this can develop the gluten in the flour and result in tough brownies. The goal is to mix until just combined, leaving no streaks of flour.
Step 4: Incorporating the Chocolate Chips and Assembling the Brownies
- Scoop out approximately one-third of the brownie mixture and set it aside in a separate bowl. This portion will be used for swirling on top of the cream cheese layer.
- Stir the chocolate chips into the remaining brownie batter. Ensure the chocolate chips are evenly distributed throughout the batter.
- Pour the chocolate chip-infused batter into the prepared baking pan and spread it into an even layer. This forms the base layer of the brownies.
Step 5: Crafting the Cream Cheese Swirl – Cream Cheese Mixture
- In a separate mixing bowl, using a hand mixer or a stand mixer fitted with the paddle attachment, beat the softened cream cheese until it is smooth and creamy. Ensure there are no lumps.
- Add the sugar to the cream cheese and beat until well combined.
- Next, add the flour, egg white, and vanilla extract. Beat until everything is thoroughly combined, scraping down the sides and bottom of the bowl as necessary to ensure even mixing. Be careful not to overbeat the cream cheese mixture, as this can make it runny.
Step 6: Creating the Swirl
- Using two tablespoons, alternate dropping portions of the cream cheese mixture and portions of the reserved plain brownie batter all over the top of the chocolate chip brownie batter in the pan. The key is to create a random pattern for the swirl.
- Using the tip of a sharp knife or a thin skewer, gently swirl the two batters together. Move in a figure-eight or back-and-forth motion to create a marbled effect. Be careful not to swirl too deeply; focus on creating visible swirls in the top layer of the brownie and cream cheese mixture.
- Avoid over-swirling, as this can muddy the colors and result in a less defined swirl pattern.
Step 7: Baking to Perfection
- Bake in the preheated oven for 32-37 minutes. The brownies are done when they are mostly set, but there should still be a slight jiggle in the cream cheese areas.
- You can check for doneness by inserting a toothpick into the center of the brownie; it should come out with moist, fudgy crumbs and/or melted chocolate clinging to it. Avoid overbaking, as this will result in dry brownies.
- If you notice that the cream cheese swirls are browning too quickly, you can loosely cover the baking dish with aluminum foil for the last 5 minutes or so of baking time. This will prevent the cream cheese from burning.
Step 8: Cooling and Serving
- Remove the brownies from the oven and place them on a wire rack to cool completely. This is a crucial step for achieving the perfect texture.
- Allow the brownies to cool completely in the pan. This process can take several hours, but it is essential for firming up the brownies and making them easier to cut.
- Once the brownies are completely cool, use the foil or parchment paper overhang to lift the entire tray of brownies out of the pan.
- Cut the brownies into squares and serve.
Why You Will Love This Recipe
These cream cheese swirl brownies are the ultimate indulgence. The fudgy, rich chocolate base is perfectly complemented by the tangy, creamy swirls of cream cheese. The combination of textures and flavors is irresistible. They are easy to make and impressive to serve, making them perfect for parties, potlucks, or simply a delicious treat for yourself. The swirls also make each brownie visually appealing, and you can easily customize them with different types of chocolate chips or extracts for added flavor.
Serving Suggestions:
- Serve warm or at room temperature.
- Pair with a scoop of vanilla ice cream or a dollop of whipped cream.
- Dust with powdered sugar for an elegant presentation.
- Serve with a glass of cold milk or a cup of hot coffee.
- Cut into smaller squares for a party appetizer.
- Add a drizzle of chocolate sauce for extra decadence.
Tips:
- Use high-quality cocoa powder for the best flavor.
- Make sure the cream cheese is fully softened to avoid lumps in the cream cheese mixture.
- Don’t overmix the brownie batter, as this can result in tough brownies.
- Swirl the batters gently to create a marbled effect without muddying the colors.
- If you want to add a boost to your brownies, consider adding a teaspoon of instant espresso powder to the brownie batter for a deeper chocolate flavor.
- Adjust the baking time according to your oven.
- Let the brownies cool completely before cutting for clean, even slices.
Prep Time: 20 minutes Cook Time: 32-37 minutes Total Time: Several hours for cooling (at least 2-3 hours)
Nutritional Information: (Per Serving, estimated) Calories: 350 Protein: 5g Sodium: 150mg
Conclusion
These Cream Cheese Swirl Brownies are a delightful treat that combines the best of both worlds: rich, fudgy brownies and creamy cheesecake. With their beautiful swirls and irresistible flavor, they are sure to be a hit with everyone who tries them. The balance of chocolate and tangy cream cheese is perfect, and the easy-to-follow instructions make them a simple and satisfying baking project. Enjoy!
Questions and Answers About This Recipe
Q1: Can I use a different size pan?
A: While an 8×8 inch pan is ideal for achieving the right thickness and texture, you can use a 9×9 inch pan, but the brownies will be slightly thinner, so you may need to reduce the baking time by a few minutes. Avoid using a larger pan, as the batter will spread too thin, resulting in dry brownies.
Q2: What if I don’t have cream cheese? Can I substitute something else?
A: While cream cheese is essential for achieving the signature swirl and tangy flavor, you could try using mascarpone cheese as a substitute. It has a similar creamy texture and mild flavor. However, the overall taste will be slightly different. Unfortunately, there isn’t an ingredient that would be an ideal substitute.
Q3: Can I add nuts to this recipe?
A: Absolutely! Adding chopped walnuts, pecans, or almonds to the brownie batter would be a delicious addition. Simply stir them in along with the chocolate chips. You can also sprinkle some on top of the brownies before baking for a decorative touch.
Q4: How do I store these brownies?
A: Store the cooled brownies in an airtight container at room temperature for up to 3 days. For longer storage, you can refrigerate them for up to a week. Just be sure to bring them to room temperature before serving for the best flavor and texture. They can also be frozen for up to 2 months; wrap them tightly in plastic wrap and then in foil before freezing.
Q5: Can I make these brownies ahead of time?
A: Yes, you can absolutely make these brownies ahead of time! They actually taste even better after they’ve had a chance to cool and the flavors have melded together. Bake them a day or two in advance and store them as directed above. This is perfect for parties or when you want to have a delicious treat ready to go without any last-minute fuss.