Description of this recipe
These Chocolate Cheesecake Bars are a decadent treat that combines the rich flavors of dark chocolate and creamy cheesecake with a delightful Oreo cookie crust. This recipe transforms the classic cheesecake into an easy-to-serve bar form, perfect for parties, potlucks, or simply satisfying your sweet tooth. The smooth chocolate ganache topping adds an extra layer of indulgence, making these bars irresistible.
Why you will love this recipe
You will love these Chocolate Cheesecake Bars because they offer the perfect balance of textures and flavors. The crunchy Oreo crust provides a satisfying base, while the creamy chocolate cheesecake filling melts in your mouth. The chocolate ganache topping is the perfect finishing touch, adding a glossy, rich layer that complements the cheesecake beautifully. These bars are also incredibly easy to make, with straightforward steps that guarantee a delicious result every time. They are a crowd-pleaser that will impress anyone who tries them, making them a must-have recipe in your dessert repertoire.
Ingredients:
Oreo Crust
- 36 Oreo cookies
- 1/2 cup unsalted butter (112 grams), melted
Chocolate Cheesecake
- 10 oz dark chocolate (283 grams), 50-70%
- 24 oz full-fat cream cheese (680 grams), softened to room temperature
- 1 1/4 cup granulated sugar (250 grams)
- 1 tablespoon cornstarch, AKA cornflour in the UK
- 2 tsp vanilla extract
- 3/4 cup sour cream (180 ml), room temperature
- 4 large eggs, room temperature
Chocolate Ganache
- 8 ounces dark chocolate (226 grams), about 50% or semi-sweet
- 2/3 cup heavy cream (160 ml), or whipping cream
Preparation:
Step 1: Preheat the oven to 325°F (160°C). Lightly grease a 9×13 inch (23 x 33 cm) baking pan, or line with aluminum foil, ensuring there’s an overhang around the edges for easy removal.
Step 2: Prepare the Oreo Crust: Add the Oreo cookies (wafers and filling) to a food processor and pulse until fine crumbs. Alternatively, place the cookies in a freezer bag and crush with a rolling pin.
Step 3: Mix together the crushed cookies and melted butter in a bowl until well combined.
Step 4: Press the mixture into the bottom of the prepared pan, creating an even layer.
Step 5: Bake the crust in the preheated oven for 8 minutes. Remove from the oven, leaving it turned on.
Step 6: Prepare the Chocolate Cheesecake Filling: Chop the dark chocolate into very small pieces. Place the chopped chocolate in a large heatproof bowl and microwave in 45-second intervals on medium power, stirring between each interval, until smooth. Alternatively, melt in a double boiler over low-medium heat. Set aside to cool slightly.
Step 7: In a very large bowl, beat the softened cream cheese, sugar, and cornstarch together until smooth and creamy (about 3-5 minutes). Scrape down the sides and bottom of the bowl as necessary.
Step 8: Beat in the melted chocolate and sour cream until well combined. Scrape down the bottom and sides of the bowl again.
Step 9: In a small bowl, whisk together the eggs. Gradually add the eggs to the cheesecake mixture, about 1/2 at a time, until just combined. Be careful not to overmix.
Step 10: Pour the batter over the baked crust and smooth the top with a spatula.
Step 11: Bake in the preheated oven for 30-35 minutes, or until the top looks almost set in the middle and the cheesecake has a slight wobble.
Step 12: Turn off the oven and open the oven door. Leave the cheesecake in the oven for about 10 minutes to cool gradually, then remove the pan from the oven.
Step 13: Cool the cheesecake fully until it reaches room temperature. Cover the pan and place in the fridge for at least 4 hours or overnight to chill completely.
Step 14: Prepare the Chocolate Ganache: Finely chop the dark chocolate and place in a heatproof bowl.
Step 15: Heat the heavy cream until almost boiling – either in the microwave using short 30-second intervals or gently in a saucepan over low heat.
Step 16: Pour the hot cream over the chocolate. Let it sit for 3-5 minutes to soften the chocolate, then whisk until smooth and glossy. If the chocolate isn’t quite melted, microwave for 15-second intervals on medium power and whisk until smooth.
Step 17: Remove the cheesecake from the fridge. Blot any moisture off the top of the cheesecake with a paper towel, then pour the ganache over the top. Smooth into an even layer with a spatula.
Step 18: Return the cheesecake to the fridge until ready to serve, allowing the ganache to set.
Step 19: When ready to serve, take the cheesecake out of the fridge. If you lined the pan, lift the bars out of the pan using the overhang of the aluminum foil – lifting from the long ends. Place on a cutting board. Slice with a sharp knife, wiping off the knife after each slice for clean cuts.
COOKING Rating:
- Difficulty: Medium
- Prep Time: 30 minutes
- Cook Time: 45 minutes
- Chill Time: 4 hours (minimum)
- Total Time: 5 hours 15 minutes
Serving Suggestions:
- Serve chilled for the best texture and flavor.
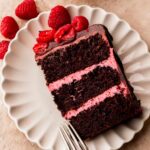
- Garnish with fresh berries such as raspberries or strawberries for a pop of color and added freshness.
- A dusting of cocoa powder or a sprinkle of sea salt can also enhance the presentation and taste.
- Serve with a scoop of vanilla ice cream or a dollop of whipped cream for an extra indulgent treat.
Tips:
- Ensure the cream cheese is fully softened to room temperature to avoid lumps in the cheesecake filling.
- Do not overmix the cheesecake batter once the eggs are added, as this can cause the cheesecake to crack during baking.
- Cooling the cheesecake gradually in the oven helps prevent cracks from forming on the surface.
- Chilling the cheesecake overnight allows the flavors to meld together and the texture to set properly.
- Use a warm, clean knife to slice the cheesecake for neat, even cuts.
Prep Time: 30 minutes
Cook Time: 45 minutes
Total Time: 5 hours 15 minutes
Nutritional Information: (per serving, approximate)
- Calories: 450-550 kcal
- Protein: 7-9 grams
- Sodium: 200-250 mg
Conclusion
These Chocolate Cheesecake Bars are a delightful treat that combines the best of both worlds: rich chocolate flavor and creamy cheesecake texture. The Oreo crust adds a fun and familiar element, while the smooth chocolate ganache elevates the dessert to a new level of indulgence. Perfect for any occasion, these bars are easy to make and sure to impress. Whether you’re hosting a party or simply craving a delicious dessert, these Chocolate Cheesecake Bars are a guaranteed crowd-pleaser. Enjoy every bite of this decadent and satisfying treat!
Q&A
- Can I use a different type of cookie for the crust?
- Yes, you can substitute Oreo cookies with other chocolate sandwich cookies or even graham crackers. If using graham crackers, consider adding a tablespoon of cocoa powder to the crust mixture for a richer chocolate flavor. Adjust the amount of butter as needed to achieve a crumbly, pressable texture.
- Can I make these cheesecake bars gluten-free?
- Absolutely! Use gluten-free Oreo cookies or any gluten-free chocolate sandwich cookies for the crust. Ensure that all other ingredients, such as the vanilla extract and chocolate, are also certified gluten-free to avoid any cross-contamination.
- What is the best way to store leftover cheesecake bars?
- Store leftover cheesecake bars in an airtight container in the refrigerator. They will stay fresh for up to 5 days. For longer storage, you can freeze the bars. Wrap them individually in plastic wrap and then place them in a freezer-safe container. Thaw in the refrigerator before serving.
- Can I use milk chocolate instead of dark chocolate?
- Yes, you can use milk chocolate if you prefer a sweeter flavor. However, keep in mind that milk chocolate will result in a sweeter and less intense chocolate flavor compared to dark chocolate. Adjust the amount of sugar in the cheesecake filling accordingly to maintain the desired balance of sweetness.
- Why did my cheesecake crack on top?
- Cheesecake cracking can occur due to several reasons, including overmixing the batter, baking at too high a temperature, or a sudden temperature change. To prevent cracking, avoid overmixing the batter once the eggs are added, ensure the oven temperature is accurate, and cool the cheesecake gradually by turning off the oven and leaving the door ajar for a period before removing it completely. Also, adding cornstarch to the filling helps stabilize the cheesecake and reduces the likelihood of cracking.