Description of this recipe:
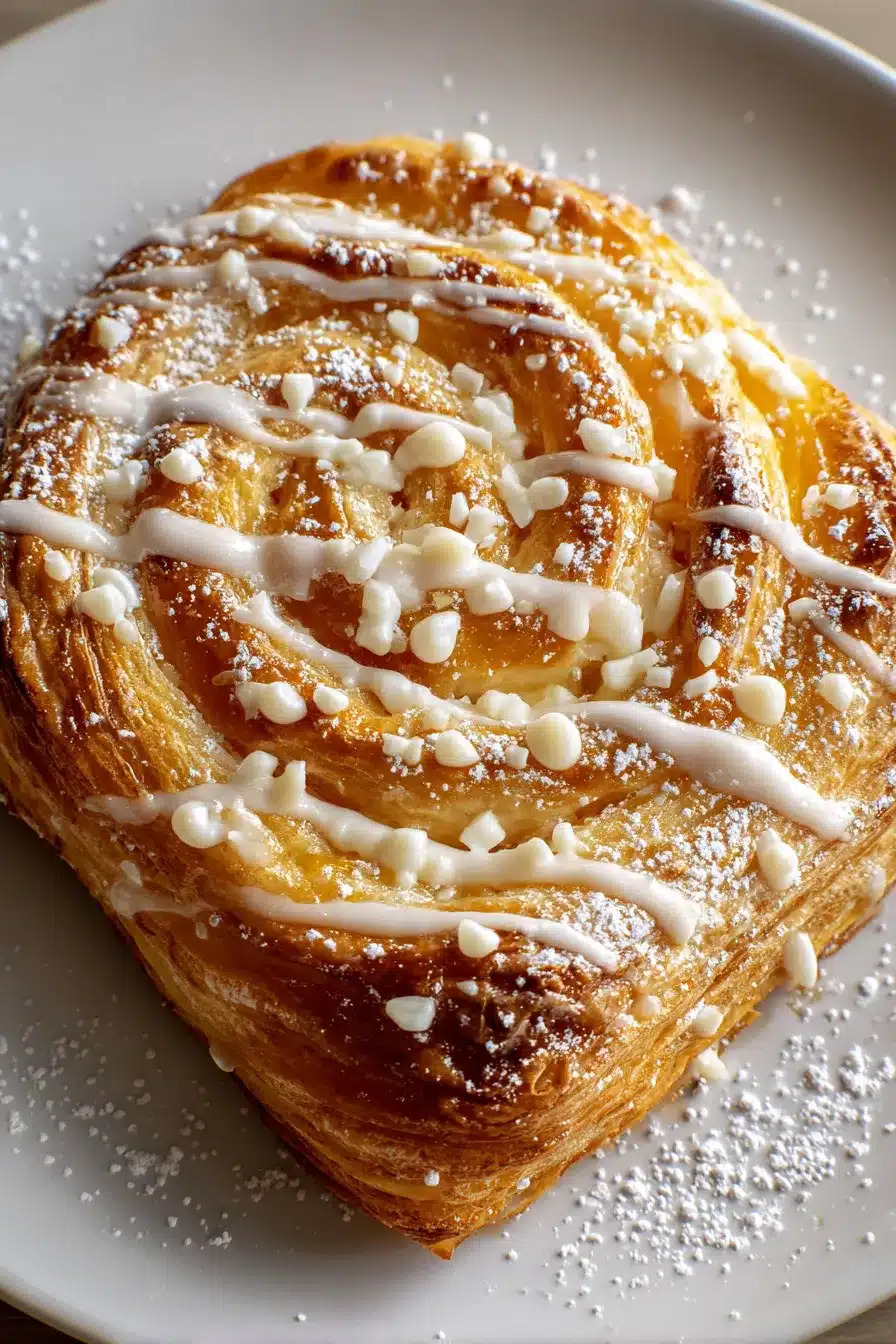
Indulge in the warmth of fall with these delectable Pumpkin Cream Cheese Danishes. This recipe combines the flaky, buttery goodness of puff pastry with a creamy, spiced pumpkin and cream cheese filling. These pastries are surprisingly easy to make, perfect for a cozy weekend breakfast, a festive brunch, or a delightful afternoon treat. The combination of textures and flavors is simply irresistible, making them a guaranteed crowd-pleaser. They are sure to fill your kitchen with the comforting aroma of pumpkin spice and warm, baked pastry.
Why you will love this recipe:
There are so many reasons to fall in love with these Pumpkin Cream Cheese Danishes! First and foremost, they deliver an incredible burst of flavor. The creamy, slightly tangy cream cheese filling is perfectly balanced by the sweet and warmly spiced pumpkin puree. The cinnamon and nutmeg add a touch of autumnal magic, making each bite a celebration of the season.
Beyond the delightful flavor, these danishes are surprisingly simple to prepare. Using store-bought puff pastry significantly cuts down on the prep time, allowing you to enjoy these treats without spending hours in the kitchen. The filling comes together quickly with just a few basic ingredients, and the simple folding technique makes assembly a breeze.
These danishes are also incredibly versatile. You can easily customize the recipe to suit your preferences. Add a drizzle of maple syrup or a sprinkle of chopped pecans for extra sweetness and texture. They are also perfect for entertaining, as they can be made ahead of time and baked just before serving.
Finally, these danishes are simply beautiful. The golden-brown, flaky crust and the creamy filling create a visually appealing treat that is sure to impress. A light dusting of powdered sugar adds a touch of elegance, making them perfect for special occasions.
Ingredients:
- 1 sheet puff pastry, thawed
- 4 oz cream cheese, softened
- 1/4 cup pumpkin puree
- 1/4 cup granulated sugar
- 1 teaspoon vanilla extract
- 1/2 teaspoon ground cinnamon
- 1/4 teaspoon ground nutmeg
- 1 egg, beaten (for egg wash)
- 1 tablespoon powdered sugar (optional, for dusting)
Preparation:
Step 1: Preheat the oven to 400°F (200°C). This ensures that the puff pastry will rise properly and become golden brown. Line a baking sheet with parchment paper. Parchment paper prevents the danishes from sticking to the baking sheet and makes cleanup a breeze.
Step 2: Roll out the thawed puff pastry sheet on a lightly floured surface. A lightly floured surface prevents the puff pastry from sticking and makes it easier to work with. Cut into 8 equal rectangles. Precise cutting ensures that each danish is uniform in size and bakes evenly. Using a pizza cutter or a sharp knife will provide the cleanest cut.
Step 3: In a mixing bowl, combine the softened cream cheese, pumpkin puree, granulated sugar, vanilla extract, ground cinnamon, and ground nutmeg. Softened cream cheese is essential for a smooth and creamy filling. Mix until smooth and well incorporated. This ensures that all the ingredients are evenly distributed and that the filling has a consistent texture.
Step 4: Place a generous tablespoon of the pumpkin cream cheese mixture in the center of each puff pastry rectangle. Avoid overfilling the pastries, as this can cause the filling to spill out during baking. Fold the corners of each rectangle towards the center, overlapping slightly, to create a pocket. This creates a visually appealing danish and helps to contain the filling. Gently press the corners to seal them.
Step 5: Arrange the filled pastries on the prepared baking sheet, leaving some space between them. Adequate spacing allows for proper air circulation, which helps the pastries bake evenly. Brush the top of each pastry with the beaten egg to add shine. Egg wash adds a beautiful golden-brown color and a glossy finish to the pastries.
Step 6: Bake in the preheated oven for 15-20 minutes or until the pastries are golden brown and puffy. Keep a close eye on the pastries during baking to prevent them from burning. The baking time may vary depending on your oven. Remove from the oven and let them cool slightly on a wire rack. Cooling on a wire rack prevents the pastries from becoming soggy.
Step 7: Dust with powdered sugar before serving, if desired. Powdered sugar adds a touch of sweetness and elegance to the danishes.
COOKING Rating:
Easy
Serving Suggestions:
These Pumpkin Cream Cheese Danishes are delicious on their own, but they can also be served with a variety of accompaniments.
- Serve them warm with a scoop of vanilla ice cream for a decadent dessert.
- Enjoy them with a cup of hot coffee or tea for a cozy breakfast or afternoon treat.
- Drizzle them with maple syrup or caramel sauce for extra sweetness.
- Serve them with a side of fresh fruit, such as berries or sliced apples.
- For a festive brunch, serve them alongside other breakfast favorites, such as scrambled eggs, bacon, and fruit salad.
Tips:
- Make sure the cream cheese is fully softened before mixing the filling. This will prevent lumps and ensure a smooth texture.
- Don’t overfill the pastries, as this can cause the filling to spill out during baking.
- If you don’t have pumpkin puree, you can make your own by roasting a pumpkin and pureeing the flesh.
- For a richer flavor, use brown sugar instead of granulated sugar in the filling.
- Add a sprinkle of chopped pecans or walnuts to the filling for extra texture and flavor.
- If you want to make the danishes ahead of time, you can assemble them and store them in the refrigerator overnight. Bake them just before serving.
- To reheat the danishes, bake them in a preheated oven at 350°F (175°C) for 5-10 minutes or until warmed through.
Prep Time: 20 minutes
Cook Time: 20 minutes
Total Time: 40 minutes
Nutritional Information: (Per Danish, estimated)
- Calories: 250
- Protein: 4g
- Sodium: 150mg
Conclusion:
These Pumpkin Cream Cheese Danishes are a delightful way to celebrate the flavors of fall. With their flaky crust, creamy filling, and warm spices, they are sure to become a new favorite. They are easy to make, versatile, and perfect for any occasion. So, gather your ingredients, preheat your oven, and get ready to enjoy these delicious treats! They are the perfect addition to your fall baking repertoire. This recipe offers a simple yet elegant way to bring the essence of autumn to your table, filling your home with the inviting aroma of pumpkin spice and baked pastry.
Questions and Answers:
Q1: Can I use homemade puff pastry for this recipe?
A: Absolutely! While using store-bought puff pastry simplifies the process and saves time, homemade puff pastry will undoubtedly elevate the flakiness and buttery flavor of the danishes. Just be sure to give yourself ample time, as making puff pastry from scratch can be a labor of love.
Q2: Can I substitute the pumpkin puree with something else?
A: While pumpkin puree is the star of this recipe, you could experiment with other similar purees. Sweet potato puree or butternut squash puree would both offer a similar texture and subtle sweetness. However, keep in mind that the flavor profile will change slightly, so you might need to adjust the spices accordingly.
Q3: What if I don’t have nutmeg on hand?
A: While nutmeg contributes a warm and distinctive flavor, you can certainly omit it if you don’t have it. You could substitute it with an equal amount of allspice or simply increase the amount of cinnamon slightly to compensate.
Q4: How do I store leftover danishes?
A: Leftover danishes are best stored in an airtight container at room temperature. They will stay fresh for up to 2 days. You can also reheat them in a warm oven or microwave for a few seconds to restore their warmth and flakiness.
Q5: Can I freeze these danishes?
A: Yes, you can freeze these danishes! To freeze them, let them cool completely after baking. Then, wrap them individually in plastic wrap and place them in a freezer-safe bag or container. They can be stored in the freezer for up to 2 months. When you’re ready to enjoy them, thaw them overnight in the refrigerator and reheat them in a warm oven.