Description of this recipe
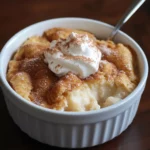
This Stovetop Apple Butter recipe transforms simple apples into a lusciously smooth and richly flavored spread, perfect for slathering on toast, swirling into oatmeal, or gifting to friends and family. Crafted entirely on the stovetop, this method offers a comforting aroma that fills your kitchen and yields a depth of flavor that rivals slow cooker versions. The combination of sweet and tart apples, a touch of spice, and the slow caramelization process creates a deeply satisfying condiment that captures the essence of autumn in every spoonful.
Why you will love this recipe
You’ll fall in love with this apple butter because of its incredible flavor, ease of preparation, and versatility. Unlike store-bought versions, this homemade apple butter allows you to control the sweetness and spice levels, tailoring it perfectly to your taste. The stovetop method is quicker than traditional slow cooker recipes, making it ideal for those who crave homemade goodness without the all-day commitment. The rich, caramelized flavor is simply irresistible, and its applications are endless—from topping pancakes and waffles to glazing roasted meats and adding a touch of sweetness to savory dishes. Plus, making your own apple butter is a rewarding experience, filling your home with the comforting scent of apples and spices.
Ingredients:
- Apples (peeled, cored, chopped): 2½ pounds
- Water: ⅓ cup
- Apple cider: ¼ cup
- Lemon juice: 3 tablespoons
- Light brown sugar (packed): ½ cup
- Granulated sugar: ¼ cup
- Apple pie spice: 1–2 teaspoons
- Salt: ¼ teaspoon
Preparation:
Step 1: Simmer the apples
In a large, heavy-bottomed pot or Dutch oven, combine the chopped apples, water, apple cider, and lemon juice. Stir well to ensure all the apples are moistened. The water and apple cider will prevent the apples from sticking to the bottom of the pot during the initial cooking phase, while the lemon juice helps to brighten the flavor and prevent oxidation.
Step 2: Cook until softened
Place the pot over medium heat and bring the mixture to a simmer. Once simmering, reduce the heat to low, cover the pot, and cook for approximately 45 minutes, or until the apples are very soft and easily mashed with a spoon. Stir the mixture frequently to prevent sticking and ensure even cooking. The apples should break down significantly during this process, releasing their natural sugars and creating a soft, pulpy base for the apple butter.
Step 3: Purée the mixture
Remove the pot from the heat and carefully purée the apple mixture until it is completely smooth. You can use an immersion blender directly in the pot for this step, which is the easiest and most convenient method. Simply insert the immersion blender into the pot and blend until the mixture is silky smooth. Alternatively, you can transfer the apple mixture in batches to a regular blender or food processor. If using a blender or food processor, be sure to vent the lid to allow steam to escape and prevent pressure buildup. After blending, return the puréed apple mixture to the pot.
Step 4: Add flavor and sweetness
Stir in the brown sugar, granulated sugar, apple pie spice, and salt into the puréed apple mixture. Mix well to ensure the sugars and spices are evenly distributed throughout the mixture. The brown sugar adds a rich, molasses-like flavor, while the granulated sugar provides additional sweetness. The apple pie spice contributes warmth and complexity, complementing the natural apple flavor. The salt enhances the sweetness and balances the overall flavor profile.
Step 5: Cook low and slow
Return the pot to the stovetop and reduce the heat to low. Cook the apple butter for approximately 40 minutes, or until it has thickened to your desired consistency and turned a deep amber brown color. Stir the mixture frequently, especially towards the end of the cooking time, to prevent sticking and scorching. As the apple butter cooks, the sugars will caramelize, deepening the flavor and creating a rich, complex taste.
Step 6: Test for doneness
To test if the apple butter is done, dip a spoon into the mixture and draw a line through it with your finger. If the line holds its shape and doesn’t immediately fill back in with the apple butter, it is ready. If the line fills in quickly, continue cooking the apple butter for a few more minutes, stirring frequently, and test again.
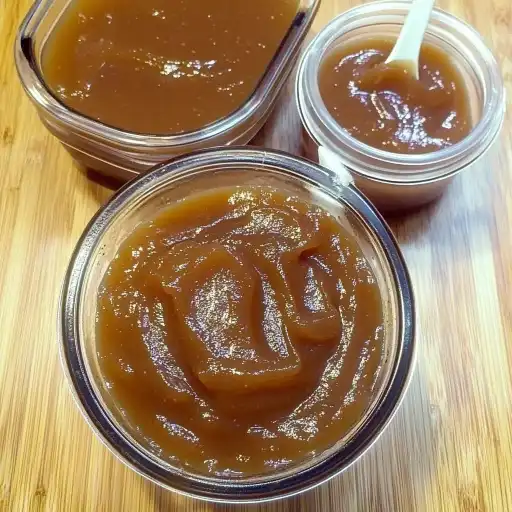
Step 7: Cool and store
Remove the pot from the heat and allow the apple butter to cool completely. As it cools, it will thicken further. Once cooled, transfer the apple butter to an airtight container and store it in the refrigerator for up to 2 weeks. You can also freeze the apple butter for longer storage; simply transfer it to a freezer-safe container and freeze for up to 3 months.
COOKING Rating:
Easy
Serving Suggestions:
- Spread generously on toast, bagels, or English muffins.
- Swirl into oatmeal, yogurt, or granola for a flavorful breakfast.
- Top pancakes, waffles, or French toast for a decadent treat.
- Use as a filling for thumbprint cookies or mini tarts.
- Serve alongside cheese and crackers for a sophisticated appetizer.
- Glaze roasted chicken, pork, or ham for a sweet and savory dish.
- Stir into barbecue sauce for a unique twist on a classic condiment.
- Gift to friends and family in decorative jars with a personalized label.
Tips:
- Choose the right apples: A combination of sweet and tart apples, such as Honeycrisp, Fuji, and Granny Smith, will provide the best flavor.
- Adjust the spices: Feel free to adjust the amount of apple pie spice to your liking. You can also add a pinch of cinnamon, nutmeg, or cloves for extra warmth.
- Prevent sticking: To prevent the apple butter from sticking to the bottom of the pot, use a heavy-bottomed pot or Dutch oven and stir frequently, especially towards the end of the cooking time.
- Control the sweetness: If you prefer a less sweet apple butter, reduce the amount of sugar slightly.
- Sterilize jars for canning: For longer-term storage, sterilize canning jars and process the apple butter in a water bath canner according to USDA guidelines.
- Add vanilla extract: Stir in a teaspoon of vanilla extract at the end of cooking for an extra layer of flavor.
- Use other sweeteners: Substitute maple syrup or honey for some or all of the sugar for a different flavor profile.
- Make it spicy: Add a pinch of cayenne pepper for a touch of heat.
Prep Time:
15 minutes
Cook Time:
1 hour 25 minutes
Total Time:
1 hour 40 minutes
Nutritional Information:
(Note: Nutritional information is an estimate and may vary based on specific ingredients and portion sizes.)
Calories: Approximately 50 per tablespoon
Protein: Less than 1 gram per tablespoon
Sodium: Approximately 10 milligrams per tablespoon
Conclusion
This Stovetop Apple Butter recipe is a delightful way to capture the essence of fall in a jar. With its rich, caramelized flavor and versatile applications, it’s a homemade treat that will be enjoyed by all. Whether you’re spreading it on your morning toast, gifting it to loved ones, or using it to elevate your favorite recipes, this apple butter is sure to become a staple in your kitchen. The ease of the stovetop method makes it accessible for cooks of all skill levels, and the customizable ingredients allow you to create a truly unique and personal condiment. So, gather your apples, spices, and a little patience, and get ready to savor the warm, comforting flavors of homemade apple butter.
Questions and Answers:
Q1: Can I use different types of apples for this recipe?
A: Absolutely! In fact, using a combination of different apple varieties can enhance the flavor of the apple butter. Sweet apples like Honeycrisp or Fuji pair well with tart apples like Granny Smith. Feel free to experiment with your favorite apples to create a unique flavor profile. Just be sure to peel and core them before chopping.
Q2: How can I prevent the apple butter from sticking to the pot while cooking?
A: To prevent sticking, it’s important to use a heavy-bottomed pot or Dutch oven, which will distribute heat more evenly. Stir the apple butter frequently, especially as it thickens towards the end of the cooking time. If you notice any sticking, reduce the heat slightly and continue stirring diligently.
Q3: Can I freeze apple butter for longer storage?
A: Yes, apple butter freezes very well. Allow the apple butter to cool completely, then transfer it to a freezer-safe container, leaving a little headspace to allow for expansion. Seal the container tightly and freeze for up to 3 months. When ready to use, thaw the apple butter in the refrigerator overnight.
Q4: How do I know when the apple butter is done cooking?
A: The apple butter is done when it has thickened to your desired consistency and turned a deep amber brown color. A good way to test for doneness is to dip a spoon into the mixture and draw a line through it with your finger. If the line holds its shape and doesn’t immediately fill back in with the apple butter, it is ready.
Q5: Can I add other spices to the apple butter?
A: Certainly! Apple pie spice is a classic addition, but you can customize the spice blend to your liking. Cinnamon, nutmeg, cloves, ginger, and even a pinch of cardamom can add warmth and complexity to the flavor. Start with small amounts and adjust to taste. You can also add a teaspoon of vanilla extract at the end of cooking for an extra layer of flavor.