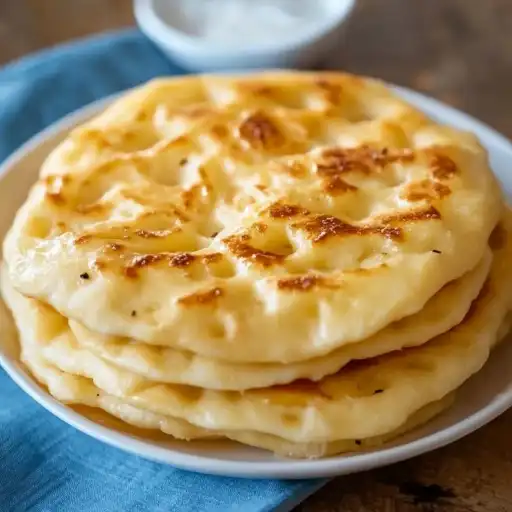
Description of this recipe: This Easy 10-Minute Skillet Bread recipe is a game-changer for anyone craving freshly baked bread without the fuss of traditional baking. Perfect for busy weeknights, unexpected guests, or those moments when you simply want a warm, comforting loaf without turning on the oven, this recipe delivers delicious, rustic bread straight from your stovetop. The simplicity and speed of this method make it accessible to even the most novice bakers, guaranteeing a satisfying result every time.
Why you will love this recipe: You’ll fall in love with this skillet bread because it offers the unbeatable combination of speed, simplicity, and satisfaction. Forget the long proofing times and precise oven temperatures; this recipe streamlines the bread-making process, taking you from ingredients to warm, crusty bread in just a few minutes. The texture is wonderfully rustic, with a crisp exterior and a soft, chewy interior. It’s incredibly versatile, pairing perfectly with soups, salads, or simply enjoyed with a smear of butter. Plus, the ease and convenience make it a go-to recipe you’ll turn to time and time again.
Ingredients:
- 4 cups of all-purpose flour
- 1 tablespoon of sugar
- 1 tablespoon of salt
- 2 teaspoons of active dry yeast
- Warm water (enough to form dough)
Preparation:
Step 1: Begin by gathering all your ingredients. In a large mixing bowl, combine the all-purpose flour, sugar, salt, and active dry yeast. Ensure that the yeast is fresh to guarantee a good rise. The sugar not only adds a subtle sweetness but also aids in activating the yeast.
Step 2: Gradually introduce the warm water to the dry ingredients. It’s crucial that the water is warm, not hot, to avoid killing the yeast. As you pour the water, start mixing the ingredients with a wooden spoon or your hands. Continue adding water until the dough begins to come together. You’re aiming for a soft, slightly sticky dough that isn’t overly wet. The exact amount of water may vary depending on the humidity and the type of flour used.
Step 3: Once the dough has formed, transfer it to a lightly floured surface. Knead the dough for about 5 to 7 minutes. Kneading is essential as it develops the gluten in the flour, which gives the bread its structure and chewy texture. Work the dough with your hands, pushing, folding, and turning it. The dough should gradually become smooth, elastic, and springy to the touch. If the dough is too sticky, add a little flour, one tablespoon at a time, until it reaches the desired consistency.
Step 4: After kneading, place the dough back into the mixing bowl. Cover the bowl with a damp cloth or plastic wrap. Let the dough rest for just 10 minutes. This short resting period allows the gluten to relax, making the dough easier to shape and work with in the next steps.
Step 5: Remove the dough from the bowl and place it on a lightly floured surface. Divide the dough into even portions. The number of portions will depend on the size of your skillet and your preference for the final bread size. Typically, dividing the dough into 4 to 6 portions works well. Shape each portion into a flat round or mini loaf. Ensure that the dough is smooth and even for consistent cooking.
Step 6: Preheat your skillet over medium heat. A non-stick skillet or a well-seasoned cast iron skillet works best for this recipe. If using a non-stick skillet, no oil is needed. If using cast iron, a light coating of oil can help prevent sticking.
Step 7: Carefully place the dough portions into the preheated skillet. Ensure that there is enough space between each piece to allow for even cooking. Cook each side for about 5 minutes, or until golden brown and cooked through. Use a spatula to gently flip the bread. The cooking time may vary depending on the thickness of the dough and the heat of your skillet, so keep a close eye on the bread to prevent burning.
Step 8: Once the skillet bread is golden brown and cooked through, transfer it to a wire rack or plate. Let it cool slightly before slicing or tearing into it. This allows the bread to finish cooking and the crust to set.
COOKING Rating: Easy
Serving Suggestions: This skillet bread is incredibly versatile and pairs well with a variety of dishes. Serve it alongside hearty soups and stews for a comforting meal. It’s also delicious with salads, providing a satisfying carbohydrate component. Enjoy it as an appetizer with a selection of cheeses and spreads, or simply savor it warm with butter or olive oil. For a breakfast treat, toast a slice and top it with avocado and a fried egg.
Tips:
- For a richer flavor, add a tablespoon of olive oil to the dough while kneading.
- Experiment with adding herbs or spices to the dough, such as rosemary, garlic powder, or Italian seasoning.
- If you don’t have active dry yeast, you can use instant yeast. Just add it directly to the flour without proofing.
- To ensure even cooking, use a skillet with a heavy bottom that distributes heat evenly.
- If the bread is browning too quickly, reduce the heat to medium-low and continue cooking until done.
- Leftover skillet bread can be stored in an airtight container at room temperature for up to 2 days. Reheat it in a skillet or toaster oven for the best results.
Prep Time: 15 minutes
Cook Time: 20 minutes
Total Time: 35 minutes
Nutritional Information: (Note: The following values are approximate and can vary based on specific ingredients and portion sizes.) Calories: Approximately 250-300 per serving Protein: 6-8 grams per serving Sodium: 300-400 mg per serving
Conclusion: This Easy 10-Minute Skillet Bread recipe is a testament to the fact that delicious, homemade bread doesn’t have to be complicated or time-consuming. Its simplicity and speed make it a perfect choice for any occasion, whether you’re a seasoned baker or just starting out. With minimal ingredients and a straightforward method, you can enjoy warm, crusty bread straight from your stovetop in just minutes. So, ditch the store-bought loaves and embrace the joy of making your own skillet bread – you won’t be disappointed!
5 Questions and Answers About This Recipe:
Q1: Can I use a different type of flour for this recipe? A: While all-purpose flour is recommended for its gluten content, you can experiment with other flours. Bread flour will provide a chewier texture, while whole wheat flour will add a nutty flavor. Keep in mind that different flours may require adjustments to the amount of water needed.
Q2: How do I know when the skillet bread is fully cooked? A: The skillet bread is done when it is golden brown on both sides and feels firm to the touch. You can also insert a toothpick into the center of a loaf; if it comes out clean, the bread is cooked through.
Q3: Can I add cheese to this recipe? A: Absolutely! Adding cheese can enhance the flavor and texture of the skillet bread. Incorporate shredded cheese, such as cheddar, mozzarella, or Parmesan, into the dough while kneading or sprinkle it on top before cooking.
Q4: Is it possible to make this recipe gluten-free? A: Yes, you can adapt this recipe to be gluten-free by using a gluten-free all-purpose flour blend. However, gluten-free flours often require additional binding agents, such as xanthan gum, to achieve a similar texture to traditional bread.
Q5: Can I freeze the skillet bread for later? A: Yes, you can freeze the skillet bread for up to 2-3 months. Wrap the bread tightly in plastic wrap and then in a freezer bag to prevent freezer burn. When ready to eat, thaw the bread overnight in the refrigerator or at room temperature and reheat it in a skillet or toaster oven.