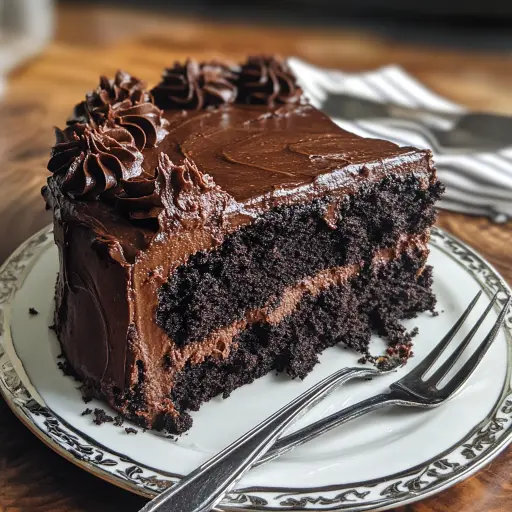
A deeply decadent and intensely chocolate-flavored cake, the Brooklyn Blackout Cake is a true showstopper and a testament to the power of chocolate. This cake isn’t just dessert; it’s an experience, a rich and evocative journey back to a time when bakeries proudly displayed their mastery with towering, impressive confections. It’s comprised of incredibly moist chocolate cake layers, a velvety smooth chocolate pudding filling that oozes richness with every bite, and a luxurious, glossy chocolate frosting that perfectly complements the other elements. Scattered throughout the frosting, you’ll find generous crumbles of cake, adding another layer of textual complexity and reinforcing the cake’s intense chocolate character. This recipe is a tribute to the original, paying homage to the classic flavors while incorporating techniques that ensure a reliably delicious outcome every time.
Why you will love this recipe:
- Intense Chocolate Flavor: This cake is a celebration of chocolate in all its glorious forms. From the cake layers to the pudding and the frosting, every element is designed to deliver an unforgettable chocolate experience.
- Moist and Tender Cake: The cake layers are incredibly moist, thanks to the inclusion of buttermilk and hot coffee, which helps to unlock the cocoa’s flavor and create a delicate crumb.
- Decadent Pudding Filling: The homemade chocolate pudding filling is smooth, rich, and intensely chocolatey. It adds a wonderful creaminess and depth of flavor to the cake.
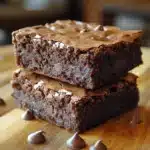
- Beautiful Presentation: The combination of dark chocolate cake, glossy frosting, and scattered crumbles makes for a visually stunning cake that’s sure to impress.
- A Piece of History: The Brooklyn Blackout Cake has a fascinating history, making it more than just a dessert; it’s a conversation starter.
Ingredients:
- For the Chocolate Cake:
- 1 3/4 cups all-purpose flour
- 2 cups granulated sugar
- 3/4 cup unsweetened cocoa powder (Dutch-processed preferred)
- 2 teaspoons baking soda
- 1 teaspoon baking powder
- 1 teaspoon salt
- 1 cup buttermilk, room temperature
- 1/2 cup vegetable oil
- 2 large eggs, room temperature
- 1 teaspoon vanilla extract
- 1 cup freshly brewed hot coffee
- For the Chocolate Pudding Filling:
- 2 tablespoons unsweetened cocoa powder
- 6 tablespoons granulated sugar
- 1 ounce bittersweet chocolate, finely chopped
- 1/4 teaspoon salt
- 2 tablespoons cornstarch
- 2 tablespoons cold water
- 1 teaspoon vanilla extract
- 1 tablespoon unsalted butter
- For the Chocolate Frosting:
- 3/4 cup (1 1/2 sticks) unsalted butter, softened
- 12 ounces semisweet chocolate, finely chopped
- 1/2 cup hot water
- 1 tablespoon light corn syrup
Preparation:
Step 1: Prepare the Cake Layers
- Preheat the oven to 350°F (175°C). Grease and flour two 8-inch round cake pans. For extra insurance against sticking, you can line the bottoms with parchment paper rounds.
- In a large bowl, whisk together the flour, sugar, cocoa powder, baking soda, baking powder, and salt.
- In a separate bowl, combine the buttermilk, vegetable oil, eggs, and vanilla extract. Whisk until well combined.
- Gradually add the wet ingredients to the dry ingredients, mixing on low speed until just combined.
- Slowly pour in the hot coffee and mix until the batter is smooth. The batter will be quite thin, which is normal.
- Divide the batter evenly between the prepared cake pans.
- Bake for 30-35 minutes, or until a toothpick inserted into the center comes out clean.
- Let the cakes cool in the pans for 10 minutes before inverting them onto a wire rack to cool completely.
Step 2: Make the Chocolate Pudding Filling
- In a medium saucepan, whisk together the cocoa powder, sugar, salt, and cornstarch.
- Gradually whisk in the cold water until the mixture is smooth.
- Add the bittersweet chocolate and cook over medium heat, stirring constantly, until the mixture comes to a boil and thickens.
- Remove from heat and stir in the vanilla extract and butter until melted and smooth.
- Transfer the pudding to a bowl, cover with plastic wrap (pressing the plastic wrap directly onto the surface of the pudding to prevent a skin from forming), and refrigerate until completely cooled, at least 2 hours.
Step 3: Prepare the Chocolate Frosting
- Place the finely chopped semisweet chocolate in a heatproof bowl.
- In a small saucepan, bring the hot water and corn syrup to a simmer.
- Pour the hot water mixture over the chocolate and let it sit for 1 minute to soften the chocolate.
- Whisk until smooth and glossy.
- Let the chocolate mixture cool slightly, until it is about room temperature.
- In a large bowl, beat the softened butter with an electric mixer until light and fluffy.
- Gradually add the cooled chocolate mixture to the butter, beating on medium speed until well combined and smooth.
Step 4: Assemble the Cake
- Using a serrated knife, level the tops of the cooled cake layers.
- Crumble the cake trimmings and set aside.
- Place one cake layer on a serving plate or cake stand.
- Spread the chilled chocolate pudding filling evenly over the cake layer.
- Top with the second cake layer.
- Frost the entire cake with the chocolate frosting.
- Generously sprinkle the crumbled cake over the top and sides of the cake.
Step 5: Chill and Serve
- Refrigerate the cake for at least 30 minutes before serving to allow the frosting to set.
- Slice and serve cold.
Serving Suggestions:
- Serve with a scoop of vanilla ice cream or a dollop of whipped cream.
- Garnish with fresh berries, such as raspberries or strawberries.
- Pair with a glass of cold milk or a cup of hot coffee.
Tips:
- Use high-quality cocoa powder and chocolate: This will make a significant difference in the flavor of the cake. Dutch-processed cocoa powder is recommended for its rich, dark flavor.
- Don’t overbake the cake: Overbaking will result in dry cake layers. Check for doneness with a toothpick, and remove the cakes from the oven as soon as the toothpick comes out clean.
- Cool the cake layers completely before frosting: This will prevent the frosting from melting.
- Make the pudding filling and frosting ahead of time: This will save you time on the day you plan to assemble the cake.
- For a richer frosting, use dark chocolate instead of semi-sweet.
Prep Time: 45 minutes
Cook Time: 35 minutes
Total Time: 3 hours (includes chilling time)
Nutritional Information:
Note: Nutritional information is an estimate and may vary based on specific ingredients and portion sizes.
- Calories: Varies significantly per slice, depending on slice size. Expect a generous portion to be quite rich!
- Protein: Varies depending on slice size.
- Sodium: Varies depending on slice size.
Conclusion
The Brooklyn Blackout Cake is more than just a dessert; it’s a culinary journey, a slice of history, and a celebration of all things chocolate. Its moist cake layers, velvety pudding filling, and rich chocolate frosting create an unforgettable symphony of flavors and textures. While it requires a bit of effort, the results are well worth it. This cake is perfect for birthdays, holidays, or any special occasion when you want to impress your guests with a truly decadent and memorable treat. So, gather your ingredients, put on your apron, and get ready to create a masterpiece! The resulting cake, with its intense chocolate notes and crumbly exterior, is a loving ode to the original, bringing a taste of old-school New York charm to your kitchen.
Questions and Answers about this recipe:
Q1: Can I use regular milk instead of buttermilk?
A: While buttermilk is preferred for its tangy flavor and ability to tenderize the cake, you can substitute it with regular milk. However, you’ll need to add a tablespoon of lemon juice or white vinegar to the milk and let it sit for 5 minutes to curdle slightly. This will mimic the acidity of buttermilk and help activate the baking soda. The texture and slight flavor variation will change the cake, but it’s a passable substitute.
Q2: Can I make the cake layers ahead of time?
A: Absolutely! In fact, making the cake layers a day in advance can actually improve the flavor and texture. Wrap the cooled cake layers tightly in plastic wrap and store them at room temperature. This allows the flavors to meld and the cake to become even more moist. Just be sure they are completely cool before wrapping.
Q3: What if I don’t have Dutch-processed cocoa powder?
A: Dutch-processed cocoa powder has a deeper, richer flavor and a darker color than natural cocoa powder. If you don’t have it, you can still use natural cocoa powder, but the flavor of the cake will be slightly different. You may also want to add a pinch more baking soda to compensate for the difference in acidity. The visual difference can be quite noticeable but the taste is still great!
Q4: Can I use a different size cake pan?
A: While this recipe is designed for two 8-inch cake pans, you can use other sizes, but you’ll need to adjust the baking time accordingly. For example, if you use a 9-inch cake pan, the cake layers will be thinner and will bake faster. Keep an eye on them and check for doneness after about 25 minutes. I strongly advise against cupcakes unless you have experience and modify the time.
Q5: The frosting seems too thick/thin. What can I do?
A: The consistency of the chocolate frosting can be affected by the temperature of the ingredients and the humidity in your kitchen. If the frosting is too thick, add a tablespoon or two of warm milk or water until it reaches the desired consistency. If the frosting is too thin, refrigerate it for a few minutes to firm it up, or add a very small amount of powdered sugar, beating well after each addition. Be careful not to overbeat, as this can make the frosting grainy.